. . . with Earl and Lady Grey. A delicious time was had by all.
Cooking notes:
- I chose the tea variation listed under "Playing Around" on page 394 of Dorie's book.
- I made 2/3 recipe because I had 2 egg yolks already in the fridge. This involved a good bit of calculating. Thank goodness for my digital scale that has grams! Here are the quantities I used: 211 grams cream, 1/3 c. milk, 2 yolks, 42 grams sugar, 1 1/3 tsp vanilla.
- I used 2% milk because that's what we have. It worked fine.
- The dogs were a big help with photography.

- In planning for the tea variation, I was very tempted to use Green Tea Mojo but in the end I went with Dorie's recommendation of Earl Grey. Actually, I used a mixture of Earl Grey and Lady Grey tea, freed from their teabags. I lightly ground the tea leaves with a mortar and pestle to release the oils (bergamot orange and lemon). For future reference, 3 teabags = approximately 1 T. loose tea.

Following Dorie's instructions, I warmed the milk to a boil, then steeped the tea for 4 minutes. Or thereabouts. I set the timer incorrectly, so have no idea how long it really steeped.

Next, I strained the tea-milk through cheesecloth. I could likely steep the tea right in the teabag, and eliminate the straining step...

Then the tea-milk is brought to a boil with the cream.
The tea-milk/cream is then added to an egg/sugar/vanilla mixture (which I forgot to photograph).
 Rapping the bowl on the counter did not actually dislodge those bubbles, btw. I popped a bunch of them with my (clean) fingers once they were in individual dishes.
I strained the crème into 4 teacups, ending up with about 3/4" liquid in each.

They baked in a 200 degree oven for approximately forever. I truly lost track of how many times I reset the timer. It was maybe 90 minutes total(?) Testing them for done-ness was really tricky. They jiggled with wild abandon. Plus a dark layer (from the tea I suppose) rose to the surface and obscured what was happening beneath. That dark layer later became a skin even though I covered the surface with plastic wrap.

They firmed up nicely in the refrigerator, and it's possible that they could have had less oven time. I went from worrying that they would be raw in the center to worrying that they would be overdone and rubbery.
What I should have been worrying about was caramelizing the sugar. That's when things got ugly.
Caramelizing adventures:
Part One
I decided to use the approach so kindly explained by Sweetcharity in the this week's P&Q section. Being a bit insecure, I also googled the method, and came up with specific directions on how to caramelize sugar.
I wanted to use natural demarara sugar, brushing away those lingering doubts about knowing when it would have darkened since the sugar was already brown. I also dedicated a cup of sugar to the task, since by now I've gathered that there's such a thing as working with too little sugar (who knew?)
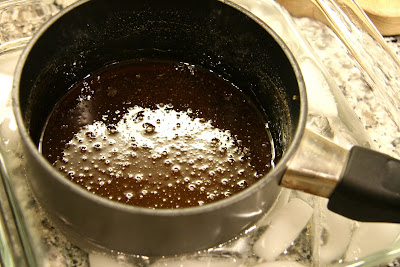
Everything was going swimmingly, but I must have let my sugar syrup progress too far, or I cooled it incorrectly. But it got really thick and my attempt to pour and swirl became glop and drop. It did harden, but was pretty thick. We were on a really tight dinner schedule, so I abandoned ship on the caramelizing, stopping after one teacup. My husband and I ate ours without the sugar crust. He said he preferred it that way. Awww, thanks, honey. My mom gave me half her (thick) sugar layer. I was glad to taste it that way, but I honestly preferred it as a custard, too. Or maybe I was just mad at the sugar.

Part Two
I had one remaining teacup of custard, and after a good night's sleep, I decided to go for the broiler method. Visions of four cracked teacups had prevented me from attempting this earlier, but at this point I was willing to sacrifice one teacup for the cause, if it came to that. So I prepared the ice bath and set the cup on it. Dorie explains that this can take from a few seconds to a few minutes under the broiler. It was minutes and minutes for me. I think it's because the custard was so far down into the cups - I just couldn't get it close enough to the broiler. I held it up right to the coil (yes, with my hand in an oven mitt), and eventually (after changing the ice twice) it bubbled. I would have liked it browner, but beggars can't be choosers.

The custard was ever so slightly melty, but my teacup survived a good 10 minutes of broiler time. Snap that photo, and done! I'll have to say it tasted great with that little layer of sugar on top.

The Verdict:
I served this when my mother came to dinner. Crème brûlée is her favorite dessert and Mom has always been a lover of tea. Turns out that Earl Grey is her favorite tea!
These tasted divine - the tea was subtle but present. Luckily they were not rubbery! There was a dark skin on the creme, but it didn't detract. The color was lovely, and the turbinado sugar was a great complement in color and flavor.
The dessert was richer than Croesus, however. (I'd wonder how it would be with using more milk and less cream?) In the end, even though I licked the spoon dry, and even though several of the variations look cool, I don't really anticipate ever cooking this again.
My mom said that when she visited Japan she had tea custard. That might be cool to check out. Here's an intriguing recipe.
 Here are some of the also-rans in the tea drawer. We are big tea-drinkers, and this is just the tip of our tea stash iceberg.
This classic dessert was chosen by Mari of Mevrouw Cupcake. You can find the recipe on her post, or on page 393 of Dorie's book, of Baking From My Home to Yours. If you want to see some truly beautiful and creative interpretations of Crème Brûlée, go check scores of other bakers' blogs on the TWD blogroll.


