Wednesday, April 15, 2009

Blood Orange Honey Sorbet


In case you're encountering a surfeit of rich chocolate confections (this could apply to pretty much anyone in Tuesdays with Dorie or Sweet Melissa Sundays!), a fresh citrus sorbet is the perfect antidote. Blood oranges are plentiful in the stores right now, and this sorbet couldn't be easier to make! I served this on Easter, along with Dorie's French Yogurt Cake, and I'll cut right to the verdict and tell you that it was the perfect refreshing end to a festive springtime meal.

n.o.e.'s notes:

- I used this recipe from David Lebovitz.

- It took 5 blood oranges to get 2 cups of juice. I included some of the more tender pulp; discarded the tough fibrous pulp and the seeds. I have a little electric juicer that my brother-in-law gave me for Christmas 20+ years ago (click for a similar model). It's perfect for this task.

- I took David's suggestion, and used honey rather than white sugar. I heated 3 fluid ounces of honey slightly to thin it, then slowly stirred in the 2 cups of juice until combined.

- Then I stirred in 4 T white wine (Reisling), and chilled the mixture for a few hours before pouring it into the ice cream churn.

the verdict:

Although I don't normally like orange-flavored frozen desserts (orange is my least favorite sherbet flavor, for example) this blood orange sorbet was different. It was fresh tasting with an intense tart + sweet flavor. We loved it with the Yogurt Cake. It's also great on its own. My husband couldn't get enough, saying, "this is the best sorbet I've ever eaten."

When we lost electricity on Monday, my first thought was, "Oh, no, the sorbet will melt!" Luckily, when the power returned after 6 hours everything in the freezer - especially the sorbet - was still perfectly frozen. There's still a scoop of sorbet left, but it won't last long!

Tuesday, April 14, 2009

{TWD} 16 Minute Magic: Chocolate Almond Torte

If ever there were ever a week when a 15-minute TWD recipe would come in handy, this one would be it. I waited until yesterday - Monday - to bake this week's Tuesdays with Dorie assignment, which didn't seem too risky of a plan, seeing as I had the day fairly free, and this was billed as a quick cake. In fact the name of the recipe is 15 Minute Magic: Chocolate Amaretti Torte. But on Monday morning our electricity fell victim to some high winds, and I had no electrical power from 10:00am to around 4:30pm. Once the power was restored to our neighborhood I realized that if this cake were going to be made during daylight hours, I'd have to hustle.

I set my timer to clock whether I could indeed have the cake in the oven in 15 minutes. I didn't count the time it took me to measure the butter (mine comes in a 1 lb block), nor, of course, the time it took for the butter and eggs to come to room temp (speeded by the microwave and a bowl of warm water respectively), and for the melted chocolate to cool (aided by the fridge).

Everything else really was very quick, and the timer rang just as I was scraping the last of the cake batter off of the food processor blade. If I'd sprayed the pan instead of rubbing it with butter, the cake would have actually made it into the oven within the 15 minutes! Nice as that was, the real magic would have been if the dishes had cleaned themselves!!

n.o.e.'s notes:

- The TWD bakers had quite a lively discussion about the amaretti/amarettini cookies that are used in this recipe. They are not particularly easy to find, especially at a reasonable price. Back in January I was going to bake a recipe that called for these cookies as an ingredient. I searched several stores with no luck, and then finally located some. But, (and this makes me sound hopelessly clueless) not only can I not remember where I finally found the cookies, I can't remember which recipe I was going to make! Luckily I did remember where I'd put them... Anyway, my best guess is that they came from World Market. The are called Amaretti Cookie Snaps, and the brand is Lazzaroni (although the writing on the package looks like it spells "Larzaroni"). This is the brand that Dorie says she prefers. Just for comparison purposes I picked up a pack of amaretti cookies from my neighborhood Starbucks - these "Amaretti del Chiostro Autentici" claim to be the original almond cookie from the Cloister of Saronno, Italy. The two brands of cookie are similar in texture and ingredient list, although I will say that the Lazzaroni ones have a pronounced almond flavor (although neither almonds nor almond flavoring are on the list of ingredients).

Amaretti Autentici (bought from Starbucks) on the left
Lazzaroni Amaretti Cookie Snaps on the right
both: imported from Italy

A major ingredient in both is - surprisingly - apricot kernels! I would not hesitate to use either one, or a combination of the two, for this torte (this time I used the Lazzaroni). The key is to use 2.75 oz of the ground up cookie.

- I baked my torte for 26 min - it was, as Dorie describes it: dry, puffed up, and a bit cracked. When I tested for doneness, the knife deflated the cake and it ended up flat, and yes, very thin.


- And here's where I have a confession to make:
I knew that I wanted to freeze this cake, and that it would be easier to freeze without the ganache glaze on it. At the same time, I had a whole bowl of leftover ganache in the fridge from Sweet Melissa's Brooklyn Brownout Cake. Sooo, I cut a little slice of Dorie's torte, spooned a bit of Melissa's ganache on top of the slice, whipped up a bit of cream, and barely eked out a photo in the last light of the day. Then I tasted the cake slice and froze the rest unglazed.

- When I thaw this cake and serve it, I plan to make the glaze that is supposed to go with it - I promise! I really love Dorie's bittersweet-based ganache glazes (The one I used, Melissa's, is a semisweet-based ganache). I will come back to this post and update it with a full report on how the cake tastes with its intended finishing touches.

the verdict:

This is a slim and sophisticated European-type torte. I love the technique of using crushed cookies and almonds in place of flour in this torte, and I equally love that the whole thing can be made in a matter of, well, 16 minutes. As for the taste, the almond flavor really comes through, along with the slightly crunchy texture of the cookies and the nuts. There's plenty of chocolate richness, so a little piece packs a powerful flavor payoff.

If I had to choose just one slim chocolate cake/torte from Dorie's book I'd have to give the edge to the Chocolate Armagnac Cake (that I baked with Grand Marnier), but this almond torte is also a keeper. Its lovely elegance is impressive and its chocolate + almond flavor is memorable. The 16 minute preparation time is a bonus, and if the dishes did magically wash themselves, it would be the clear winner! (I actually typed that "the clean winner"!! Guess who still has a sinkful of dirty dishes from this cake?)

Thanks to Holly of Phe/MOM/enon- for choosing this week's delicious cake. If you'd like to bake this yourself, the recipe is on pages 276-277 of Dorie Greenspan's book Baking From My Home to Yours, or you can check out Holly's post where you will find the recipe online.

Sunday, April 12, 2009

Sweet Melissa's Brooklyn Brownout Cake


This week's assignment for Sweet Melissa Sundays is the Brooklyn Brownout Cake; the recipe is a nod to the legendary Brooklyn Blackout Cake, made famous by Ebinger's bakeries, the last of which closed in 1972. The original version was a 3 layer chocolate cake, filled and iced with chocolate pudding and coated with crumbled cake (from a reserved layer). Over the years, people have tried to re-create the secret recipe, and the cake has inspired many spinoffs. So, I've made Dorie Greenspan's Devil's Food Whiteout Cake (with a fluffy marshmallow frosting and crumbled cake crumbs on the outside) and now Melissa's Brooklyn Brownout cake (with a chocolate ganache and crumbled brownies). I've yet to make the original! For a little history and a recipe for Brooklyn Blackout cake, click here.

n.o.e.'s notes:

- The cake is not particularly difficult, but it requires three different elements, and assembly is a bit time-consuming. The separate recipes are for brownies (a few of which are crumbled for filling the cake and coating the outside), cake (for the layers) and ganache (for frosting, and for crumble "glue")

- The first step was making Melissa's Chocolate Brownie recipe. The brownies will be the subject of a future post, but suffice it to say that they are very fudgey - and good! Most of them are now residing in the freezer.

- I had every intention of following the cake recipe to a "T". And I was doing pretty well. The only change was to substitute the 1/2 c sour cream with 1/4 c light sour cream and 1/4 c Greek yogurt (because that's what I had).

- I brewed up a big insulated coffee mug full of hot coffee, which I set aside to keep hot while I mixed the rest of the ingredients, planning to measure out 3/4 c's worth of it when I was ready to add the coffee - which was the last step in the cake batter. No doubt you can guess what happened next. Of course I just added the coffee to the batter, forgetting to measure. I figured I'd added about an extra 1/4 cup of coffee. Now what to do? I added 1/8 c. of egg substitute (equiv of 1/2 egg), hoping that would help the very liquid-y batter to set as it baked.

- I don't have the 7" cake pans the recipe specifies, so I went a different direction. I decided to use some vintage loaf pans - they are 3.5" x 7.25" (about 3/4 of a standard 4.5" x 8" loaf pan and 1/2 a 9" x 5" pan - I often use them for making a half recipe of quick breads). The batter weighed in at 1200 g, so I put 400 g in each of the two loaf pans. The remaining third of the batter got divided among 6 muffin molds (about 65 grams each). My original plan was to use some of the extra muffins to do a taste test with the devil's food cake from Dorie's Whiteout cake - I still had some of it in the freezer. But now that I messed up this recipe, a taste test wouldn't be valid.


- The cakes and cupcakes rose nicely. The cupcakes were done in 33 min and the loafs in 40 minutes.


- I froze the cupcakes for later, and split the loafs into 2 layers each. I used 3 of the layers for the cake, and froze one layer for later.

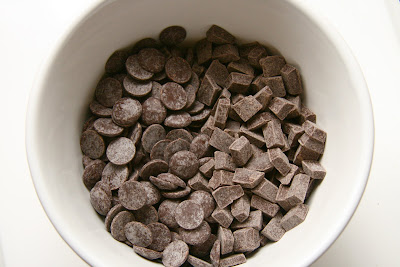
- For the ganache I used half Ghiradelli semisweet pieces (58%) - on the left, below - and half Scharffen Berger semisweet baking pieces (62%) - on the right, below. The best part? I didn't need to chop the chocolate!


- Now for the assembly. This is where Melissa lets us down. There's clearly an error in the recipe, as the directions abruptly end about half way through assembling the cake. This was frustrating, especially as there's no picture to see what we're aiming for. A quick Google search didn't turn up many pictures of the cake, either. Oh, well, after all the Sweet Melissa Sundays bakers post there will be lots of images of this cake on the internet!


- So, here's what I did: For the crumbles, I used only brownie crumbs. My cakes cratered rather than domed, so I didn't have anything to trim off. I could have used my extra layer and crumbled it, but decided to just crumble the brownies. Melissa instructions say to crumble the brownies into 3/4 in - 1 in pieces. That would have been really huge crumbles! I made mine mostly about 1/2 inch. The crumbles got mixed with just enough of the ganache to coat them.

- Between the 3 cake layers I used the crumbles as filling.


- Next I spread a layer of ganache over the whole cake, although I didn't take a ton of time to make it smooth and beautiful. I pressed the brownie crumbles on the sides with my fingers.

- I ended up using just over half the ganache and 4 brownies to fill and frost the cake (which in turn used just over half of the devil's food layer recipe). I get to save the extra ganache.

- I let the finished cake set up for several hours in the fridge. When I cut slices, they were veritable slabs of fudginess. In fact, the cake broke my Publix plastic cake cutter in half!

the verdict:

This cake is chocolate overload! It is dense, rich, and intensely chocolate. A little bit goes a loooong way, and you'd be well advised to have a tall glass of milk handy.

My husband commented: "This looks so good it makes me wish I weren't allergic to chocolate."

Elyse of Confectionary Creations chose this recipe, and you can find it on her cake post. Stop by Sweet Melissa Sundays and click on each of the bakers to see how all the different cakes turned out.

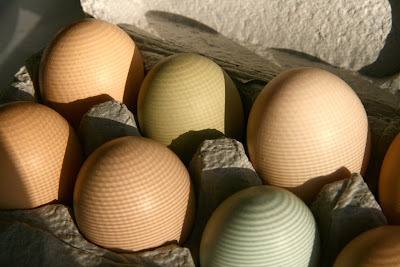
Easter Eggs from the Farm!


Thanks to my wonderful Farm Box, I have a beautiful assortment of pastel eggs, no dyeing required!


I'll be posting a chocolate cake later today, and I hope some other Easter baked goods in the next few days. Lent was meaningful, but I'll have to say, I'm glad to be able to bake and enjoy the fruits again!

Saturday, April 11, 2009

{Adventures in Yeast} #19 - Hot Cross Buns

What does a new yeast-enthusiast who has avoided sweets all Lent do when Easter is fast approaching? Make Hot Cross Buns, that's what! These buns are a rich Easter bread using all the luxurious ingredients that were traditionally not eaten during the fasting period of Lent. Hot Cross Buns are a centuries old tradition in England, but their roots go back into the murky depths of legend. (In researching bun recipes, I came across lots of information, including this interesting blog post.) I'd read that Hot Cross Buns are traditionally baked on Good Friday so I determined to do the same.

I chose a recipe from King Arthur called Easy Hot Cross Buns (click here for the recipe, and here for King Arthur's illustrated step by step post). I'd seen this recipe back in February, and the images were embedded in my mind. Nice rounded buns, stuffed with dried fruit and piped with a glossy icing cross.

My initial plan was to start on Friday right after lunch, which I figured would give me time to photograph the fresh buns in some natural light. But S-Dog was sick, and I spent all afternoon at the vet with him. By the time I got to the buns, the day was waning, and so I was stuck taking a bunch of indoor available light photos of the buns hot out of the oven.

I'm skipping over half a dozen yeast experiments to post this on in time for Easter, but I've made lots of wonderful bread and some beautiful rolls which I'll eventually post. Bolstered by recent yeasty success, I was hopeful/ confident that I'd end up with buns of beauty...

n.o.e.'s notes:

- This was my first time using SAF Gold yeast, which is supposed to be better/faster for rich dough.

- I reduced the cinnamon to 3/4 tsp, and used 1/4 tsp each of freshly ground cloves, allspice, and nutmeg.

- I mixed the dough in the food processor: first whirled the dry ingredients, then added butter, then eggs, one at a time, then (2%) milk slowly. At this point, the gluten was already pretty well developed.

- I'd read somewhere that for softer buns, you can add a bit of extra liquid then wait a half hour or so to knead the dough. That sounded really cool, so I tried it, with an extra tablespoon of milk and then let the dough rest 20 minutes. Then I kneaded the dough further in the food processor until it passed the windowpane test (the dough stretched and became translucent).


- Next I added the dried fruit: 1 oz golden raisins, 2 oz currants, 2.5 oz chopped dried cherries

- The dough was very, very sticky. VERY sticky. I think I should have kneaded in some flour. (And I shouldn't have added the extra milk)

- The dough rose very well: after one hour, it was nearly doubled, and still excessively sticky. I forged ahead, using a muffin scoop to measure out 3 3/4 oz portions, and ended up with 12 buns. They did not resemble the perfect rounded buns in the King Arthur picture. I tried smoothing the tops with oiled fingers, which was largely unsuccessful.

- After proofing the buns for another hour I popped the pan into the oven. I used Peter Reinhart's steam method - pouring hot water into a metal pan in the oven for the first 5 minutes of baking.

- They baked for close to 25 minutes until just over 200 degrees on an instant read thermometer. The buns rose a good bit and ran together into one big mass; a far cry from the perfect rounded buns I'd envisioned.

- Although I tried to loosen them, one bun stuck to the bottom of the pan when I turned them out.

- A half recipe is fine for the icing, if you use a small plastic sandwich bag (with the corner snipped) to pipe the crosses.

the verdict:

I tasted a bit of the scrap from the warm pan. It was soft and tender and gently spiced. The smell was so tantalizing that my husband begged for one to have with his after dinner coffee. I let them cool for 20 -30 minutes and pulled one off for him. The crumb was moist and shreddy and tender. He loved it! I've frozen the rest to have for Easter breakfast - can't wait for a lovely sweet whole bun to enjoy after the Lenten fasting.

These were not the perfectly formed round pillows of my imagination. But, if taste truly reigns supreme, then these hot cross buns are king!

my icing developed a pox overnight!

Thursday, April 9, 2009

Roasted "Airline" Chicken Breasts

For the past few months my freezer has been holding a carefully wrapped package of 4 boneless "airline" chicken breasts (boneless breasts with the bottom wing joint attached) that I purchased at a specialty market, figuring I'd find a good recipe for them. When I saw this Tyler Florence recipe for Roasted Airline Chicken Breast I decided to try it. It took a couple of weeks to get to the actual cooking, and during that time, the anticipation built. The recipe sounded so good; I was intrigued by the combination of black eyed peas, bacon, rice and chicken.

n.o.e.'s notes:

- I've cooked (mostly) low fat for around 20 years. Using large quantities of things like butter and cream tends to give me the willies, though I'll make an exception for special occasions. But when I'm trying new recipes regularly and they call for significant amounts of bacon fat, butter, or cream - or in this case, all three - I'm just going to have to cut fat. So I trimmed back the ingredients in this recipe where I could, but there was still plenty of the rich stuff.

- I used about half the bacon amount - the Benton's bacon that I use has quite a strong flavor. Tyler's directions call for cooking the bacon in olive oil. He's done this in other recipes, and I'm guessing this step is meant to built flavor layers (it's not like bacon is lacking in fat or anything!) I used about half the olive oil. Note: bacon does not get "crispy" in 3-4 minutes of "slow" cooking.

- My first instincts were to halve the the rice part of the recipe, and I should have listened to that little voice. There was way too much risotto for 4 pieces of chicken - the amount was more like 8 servings of rice. I ended up giving some to my neighbors; and they really liked it.

- I'm never very confident in my risotto technique, and in fact, I'm not so sure I'm even temperamentally suited to making risotto.

- Tyler's recipe uses butter, parmesan and heavy cream to finish the rice. I skipped the butter, reduced the cheese, and used 1/4 cup half-and-half instead of 1 cup of cream. Even so, the rice was plenty creamy.

This chicken smelled amazing while it was browning!
the verdict:

I had been eagerly anticipating this recipe and the bottom line is that I was disappointed. It wasn't a total bust; this was a tasty chicken + rice dish. We enjoyed it the first night and we enjoyed the leftovers all week (lots of rice!). But it wasn't spectacular, especially given the two major strikes against it: (1) it's exceptionally heart and waist unfriendly - tons of butter in the chicken, and bacon/cream/butter/cheese in the rice, and (2) it's unusually labor-intensive for my style of cooking. Without huge payoffs in the taste department I'm not likely to take the trouble of cooking it again.

On the positive side, I loved the taste of the fresh thyme + black pepper compound butter, so I might play around with those flavors in a simplified olive-oil based chicken dish.

I'm sending this off to Tyler Florence Fridays, a weekly roundup of blog posts that feature Tyler's recipes - check it out to see what everyone's cooking up!

Wednesday, April 8, 2009

Bill's Half-Size Carrot Cake

A carrot cake just in time for Easter! Perfect for all those little Easter bunnies in your life. It's also wonderful for a birthday cake or . . . a wedding cake (!?)

Ask anyone who got married in 1981 about their wedding cake, and there's a good chance they'll answer "carrot cake." We were no different. At the end of our wedding reception the bakery boxed up the top layer for us to freeze and save for our first anniversary, but after a 12 hour drive through 100-degree weather it seemed unwise to preserve the unrefrigerated cake top for another day much less a year. So it ended up in the bin, but it lived on fondly in our memories (and photos).


We have enjoyed carrot cake on many occasions in the intervening 28 years - it remains my husband's very favorite kind of cake. My standby recipe is a carrot bundt cake with cream cheese glaze, so I haven't baked a carrot layer cake in quite a long time (truth be told, I'm not sure I ever have.)

The TWD group chose Bill's Big Carrot Cake last April, long before I joined the group. No matter; it was only a question of time until I baked this recipe. My husband's birthday last Friday presented the perfect opportunity.

n.o.e.'s notes:

- As much as I would have loved to have baked a big 3 layer confection, we didn't need the vast quantity of cake that this recipe produces. So I made half recipe, which fit nicely in two 8" cake pans.

- I made a bunch of small adjustments to the recipe, some to improve the nutritional profile and others to reflect our flavor and texture preferences. Scroll down to see my adapted ingredient list for this recipe. For Dorie's recipe, with full directions, click here.

- I added some freshly grated nutmeg and a tiny pinch of cloves

- added 1/2 mashed banana

- I cut the amount of sugar (3/4 cup for half recipe) and used brown sugar instead of white sugar

- I heaped the measure of raisins, and macerated them in hot rum.

- I subbed half the flour for King Arthur white whole wheat, and the rest was all-purpose.

- Mild olive oil works well in a cake like this, and has the benefits of monounsaturated fat.

- Rather than chopped nuts, I toasted the pecans and then ground them coarsely in the food processor

- I used low fat cream cheese in the frosting and cut quantity of lemon juice in half.


the verdict:

My daughter J.D.E was home last week, and celebrated her dad's birthday with us (and had an early celebration of her own birthday, which was yesterday!) Reactions to this cake were unanimously positive.

J.D.E: "Dorie really knows what she's doing."

Husband Jim: "It's killer. At a minimum." The birthday boy absolutely loved this cake, savoring every mouthful over the course of 3 or 4 days

I sampled a few tiny bites for reporting purposes (It's annoying that the birthdays of half my family fall during Lent nearly every year). The cake was nice and moist, not too sugary. The spices were present, but mild, so they didn't distract from the cake's carrot-y goodness. There was just the slightest hint of the banana and the coconut.

The frosting was a perfect complement to the cake - creamy, smooth, and mellow; just what I love in a cream cheese frosting. Not too tangy, not too cream cheese-y, and not too sweet. Just right.

the recipe:

Bill's Half-Size Carrot Cake,
here are the ingredients I used, adapted from Dorie Greenspan's recipe. For the directions, click here.

For the cake:

1/2 cup white whole wheat flour
1/2 cup all purpose flour
1 teaspoons baking powder
1 teaspoons baking soda
1 teaspoons ground cinnamon,
pinch each of freshly grated nutmeg and ground cloves
1/2 teaspoon salt
1 1/2 cups grated carrots (about 4 carrots, grate them in food processor fitted w/ a shredding a blade)
1/2 cup finely chopped toasted pecans
1/2 cup shredded coconut (unsweetened), chopped fine in a food processor
1/4 cup (heaping) moist, plump golden raisins, macerated in 1/4 cup hot rum and drained
3/4 cup brown sugar
1/2 cup mild olive oil
2 large eggs
1/2 mashed banana (about 1/3 cup)

For the frosting:

4 ounces reduced fat cream cheese, room temperature
1/2 stick (4 tablespoons) unsalted butter, at room temperature
8 ounces confectioners’ sugar, sifted
1 tsp fresh lemon juice

Finely chopped toasted pecans for garnish

Tuesday, April 7, 2009

{TWD} Lumpy, Bumpy Banana Cream Pie

my little pie, inside a vintage 9" pie pan
Or: The Pie Only a Grandma Could Love!

When I floated the idea of Banana Cream Pie to my book group and family members, I got a lot of reactions along the lines of "eew." Personally, I like cream pies and banana ones are fine in my book. I mean they have sugar and cream, right? Although I'm not super-wild about the pieces of banana in the custard (don't like them in banana/nilla wafer pudding either) I'll definitely eat a slice of banana cream pie if it's put in front of me.

But seeing as this assignment fell in Lent, I wouldn't be eating it, and with my family and my book group both voting "no," I was left with a dilemma of what to do with the pie. It's not the easiest thing to send to the office with my husband, either. Finally I decided to halve the recipe and give the pie away to my in-laws, who I was pretty sure would enjoy it.

n.o.e.'s notes:


- Back at Thanksgiving, I compared Dorie's crust to the Cook's Illustrated (vodka method) crust, and CI came out on top [you can find the taste test at the end of my Twofer Pie post] because of its ease of handling, and superior flakiness and crispness. But I had a partial batch of Dorie's pie crust in the freezer, and a 7" foil pie pan on the foil shelf in the basement (I keep an assortment for giving away food), so I was set to make a half recipe.

- Somewhere along the way I'd read that both egg whites and egg yolks can be frozen. Without bothering to see if there are any special requirements (it turns out there are), about a month ago I tossed a bunch of leftover egg yolks in the freezer.

- I found out the hard way that thawed yolks are very thick, so whisking was difficult. When I put it over heat the pastry cream never made it to the boiling point -it thickened very quickly. I was thinking that I'd added too much cornstarch (when I halved the recipe, I went by weight not volume.) But now that I've read the P&Q, I see that others had this exact same problem. Except that they had the good sense to thin the thick pastry cream with milk. duh.

- So the cream was very thick and borderline lumpy from the thick egg yolks and maybe too much cornstarch. It looked exactly like beige wallpaper paste.

- Dorie's crust doesn't hold an edge as well as one made with more shortening. Also, I used my new pie weight chain to blind bake the crust, and while the bottom stayed flat, the crust shrank a lot. Luckily it didn't matter with a cream pie.

the verdict:

This was one homely pie!

I saved two little teaspoons of filling, which I studded with pieces of banana and a dab of the whipped cream. I tasted one and gave one to my daughter A.L.E. Her reaction:
"I like it better than I expected"

I agree.

The flavors went together very well. It's not particularly sweet, but quite creamy and silky, with a nice flavor from the brown sugar and spices.

My daughters brought the pie with them on a visit to their grandparents' house, where it made a huge hit. So the next time I have an urgent call for a banana cream pie, I know exactly which recipe I'll turn to!

Amy of Sing for Your Supper chose this week's TWD recipe, which you can find on her post, or on pages 342 and 343 of Dorie Greenspan's wonderful book Baking From My Home to Yours.. Check out the TWD blogroll to see how everyone else's pie turned out.

Sweet Wishes


To a very special girl on her big 21st birthday!
Happy Birthday, J.D.E.!!!!

Sunday, April 5, 2009

Sweet Melissa's Honey Beescotti

I've joined Sweet Melissa Sundays, a new group whose purpose is to "cook the book" - the book in question being The Sweet Melissa Baking Book. This lovely cookbook has been sitting in my house for nearly a year, and I have never made anything from it. So I just had to join, right?

I don't think I'll be able to bake each of the chosen confections (and blessedly I am only required to participate once a month) but the cookbook has some great sounding sweets (not very many pictures!) and this gives me a reason to dip into a book that would otherwise be collecting dust on my shelves. The bonus: I get to start with the group's first week!

Sweet Melissa's Patisseries are two bakeshops in Brooklyn, NY, and the goal of founder Melissa Murphy is to make "everyone's favorite desserts better than they've had them before." A worthy goal, and if I find a few "best versions" of common recipes, I'll be thrilled.

This week's recipe is Honey Beescotti, a crunchy biscotti cookie flavored with - what else? - honey. But also almond, caraway seeds, and candied orange peel. Melissa advises buying the candied peel, but Lorelei posted some helpful links for how to make homemade candied peel. Frankly it was easier than going to the store to buy any.

n.o.e.'s notes:

- I made no real changes in the recipe.

- For the orange peel I followed Giada's recipe from the Food Network site. It was really easy. Instead of using a vegetable peeler to remove just the outside portion of the peel, I scored an orange, from stem to stern, with 6 cuts. Then I peeled off each sixth of the peel in one piece, pith and all. This was pretty easy to do with the blood orange I was using. I reserved the orange and sliced the peel in long strips about 1/4 inch wide. (Using the white part is fine because the repeated boiling takes the bitterness away) Instead of boiling the peel twice in plain water, I boiled a third time before heading on to the sugar stage. Once it was done, the peel tasted like a slightly sweet version of orange peel but without bitterness.

- I have a whole drawer full of nuts, seeds and dried fruit, yet invariably I never have the correct nut that a recipe specifies (salted or unsalted, roasted or raw, chopped, slivered or whole, etc). I used lightly roasted, lightly salted marcona almonds, which I lightly chopped.

- I used mesquite honey because I don't have chestnut honey.

- I had a big internal debate about whether to use the caraway seeds. My husband is not a fan of the seeds. I'm OK with caraway seeds in Jewish Rye (although I love it without seeds also), and in coleslaw, but biscotti? But in the end I decided to try the seed and see if, under the influence of the candied peel and the almonds, it magically transformed into a marvelous taste sensation. I had a measuring mishap with the seeds, but as best I can tell, I used about half of what the recipe called for.

- The dough was very very soft and sticky. Somehow I missed the step about refrigerating the dough before forming the logs. I sprinkled flour liberally and used parchment to help form two dough logs at room temp. Than I popped them in the fridge for an hour then froze the logs for about 30 minutes. They went straight from the freezer to the oven.

- The first bake was at 335 degrees for 25 minutes, at which point the logs were nicely golden. I've got to say, my kitchen smelled delicious.

- The second bake was in a 260 degree oven for 25 minutes, turning the baking sheet halfway through.

- I ended up with 29 small biscotti.

the verdict:

Even though it's still Lent, I did sample a bite or two the biscotti so I could give a verdict. I know that my husband won't like them because of the caraway; it's not a flavor he enjoys in savory food so he'll not be excited about finding it in his sweets.

I think the chewy orange peel tastes fantastic in the biscotti. Even though I'd reduced the amount of seeds, the caraway kept fighting with the other elements and those times where it seemed to be winning, I didn't like the way it dominated the taste.

The biscotti were dry and firm but not hard, which makes them perfect for dunking in coffee because they hold together. (But the coffee seemed to emphasize the caraway taste.)

best version?

Well, truthfully, these are not the best biscotti ever. But they're still very good. I would make these biscotti again - without the caraway.

I loved making the candied peel, and will be doing that again, with other types of citrus. I've got a few leftover pieces of candied orange peel, which would be fantastic dipped in bittersweet chocolate. Right after Easter I plan to do just that. The syrup that's leftover from boiling the peel is going to be used to sweeten iced tea.

Lorelei of Mermaid Sweets chose this for our inaugural recipe, and you can find the recipe on her post, or you could buy the book and cook along with the group too!

Saturday, April 4, 2009

{Adventures in Yeast} #11 - KA Pecan Wheat Bread

Making bread has gotten a bit complicated lately. My KA mixer has developed a gear problem, and I hesitate to use it for dough (although my appliance repair man told me it shouldn't make any difference). I've had a sore right elbow and now I'm sporting a sore left wrist, so I'm trying to not do lots of kneading (although the kneading motion doesn't hurt as badly as twisting kinds of movement.) This seemed like a perfect time to try out the food processor for making bread dough. The fp as a bread making tool has its champions - Rose Levy Beranbaum, for one - and its detractors. I wasn't in a position to worry about the detractors, and set forth to make King Arthur recipe for Pecan Wheat Bread, using the fp for the heavy mixing.

n.o.e.'s notes:

- I didn't read the fp manual before making this dough (but I did read it afterwards and learned some very useful info!) My machine struggled a bit, since I had just dumped all the ingredients in at the same time, as I would have in a mixer. What I didn't know, but do now, is that in a fp you mix the dry ingredients first, then leave the motor running and add the liquid slowly, letting it get incorporated before adding more. And it's FAST.

- Right when I was ready to transfer the dough to the counter for some hand kneading, I realized I'd forgotten the yeast! So I added it, processed briefly, and then kneaded on the counter for a short time. The dough was ready. Even though it wasn't pretty or elegant in execution, the fp really got the job done on bread dough kneading.

- For the bulk rise, the dough doubled in an hour in a warm spot.

- I shaped the loaf, put it in a bread pan and left it to proof. It rose 1"+ over the rim in about 45 minutes.

- The bread was golden and fully baked in 33 minutes at 350 degrees.

the verdict:

This bread has a wonderful texture and it slices beautifully. We loved it toasted, and it would be great for sandwiches. Although it rose nicely, each slice has a good bit of substance, moistness, and chewiness. I love the balance of whole grain and slight taste of sweet nuttiness from the pecans. It tastes great just by itself!

I love working with this dough. It is a pleasure to handle, rises very well, and produces a delicious loaf of bread. If you are looking for a straightforward yeast bread recipe that tastes delicious, this is a great candidate. It's certainly destined to be a regular in my kitchen. In fact I've already made the bread again. The 2nd time it rose like crazy:

I sent the loaf with my husband for a weekend of hiking with his brother. They loved it as toast and in sandwiches.

We go through a lot of bread, especially for toast in the morning. This is why, incidentally, you see so many of my yeast adventures featuring bread baked in standard loaf pans. For several months I've been baking a couple of loaves a week. I do repeat our favorites, but the allure of trying new bread recipes is quite strong. This is leaving me with a long backlog of yeast posts and right now I'm trying to figure out how to catch up in my bread posting!

The recipe says: "If you use the smaller pan, the bread will rise very high and a bit outwards, forming a slight "mushroom" shape."

Friday, April 3, 2009

guacamole

One thing that I prepare often is guacamole. At this point I don't really use a recipe, although I've tried to write down how I make it (which you can find on this post). While I wouldn't say my guac has risen to the level of a "signature dish", it always makes a big hit when I serve it at a gathering. In fact our book group has been known to gather around the guac and chips like sharks coming in for a kill!

Not too long ago Tyler Florence's chicken enchiladas were on the menu (which I posted last time I made them) so I figured I'd make Tyler's guacamole for a change.

n.o.e.'s notes:


The recipe is simple - chop and stir a few things together. I shaded a little to the extra side for all of the add-ins, and skipped the cilantro. My husband has those tastebuds that equate cilantro with soapsuds. I like the taste, and usually sneak some into the recipe, but we had none in the house. Jim was happy that way!

My recipe doesn't have any spices beyond salt and hot peppers, but Tyler's has cumin and chili powder. Even so, his was very mild so I added a pinch of red pepper flakes. If I had any fresh hot chiles I would have added them also.

the verdict:

This was good guac. Very good actually. The seasonings were subtle, but they do give it a warm flavor. Will Tyler's guac replace my usual recipe? I don't think so. Mine tastes brighter and little fresher, with the goodness of the avocado in a starring role. Plus I can make it in my sleep!

I'm sending this over to Tyler Florence Fridays, a weekly roundup of blog posts featuring Tyler's recipes. Check it out and see what's cooking!