Tuesday, July 27, 2010

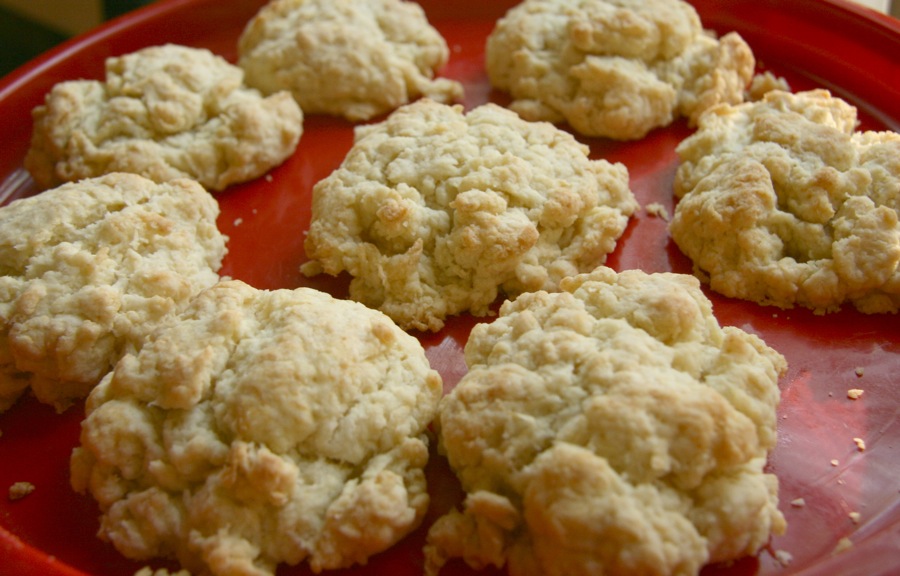
{TWD} Chewy Chunky Blondies


Back in the day, nearly 30 years ago, when I was newly married, I was introduced to my first "blondies" (so-called because they are a light, non-chocolate version of brownies) in two different ways.

There was a bakery on the mezzanine level of the big Davison's Department Store about a block from my office downtown. The only thing I remember from that bakery is their "blond brownies" - they were big and wonderfully chewy in the center - a perfect mid-afternoon snack. (There was also a cookie store in the ground floor of my office building, so even though I had no time to spend in the kitchen, thanks to those two shops I was not starved for freshly-baked goodies)

Around the same time I learned of an old recipe in my husband's family called "Butterscotch Delights" (which I recently posted, here). Over the years when I had just a bit of time I'd whip up a batch of those bar cookies and they always make a hit. In fact that's part of of the charm of a good blondie recipe: nearly everyone loves to eat the final product!

This week's assigned recipe for the baking group Tuesdays With Dorie is Chewy, Chunky Blondies, chosen by Nicole of the blog Cookies on Friday. I was eager to bake this version, which is filled with lots of chips and nuts.

n.o.e.'s notes:

- Dorie's recipe (which you can find on Nicole's post, here) calls for light brown sugar and granulated sugar. I used dark brown sugar and palm sugar - to emphasize the butterscotch-y flavor.

- Although I forgot the vanilla (accidentally) I doubled the salt (on purpose) to wake up the flavors.

- My add-ins were: toasted chopped pecans, toasted sweetened coconut, chopped Heath bar, chocolate covered cocoa nibs, and 72% chocolate chips.

- I baked half a recipe in an 8x8 pan, which I lined with a buttered parchment sling so the blondies would release easily from the pan.

- The blondies stayed in my oven about 40 minutes. They were a bit moist in the center, but I knew they'd pull together as they cooled.

- Earlier this year I tried a different loaded blondie recipe, "Killer Blondies" from the kitchn, which I posted here. That recipe was more intensely flavored; it used dark brown sugar along with even darker muscovado sugar, and instant coffee dissolved in brandy. (It also had a topping which I found to be a bit too crumbly and quite sweet.)

the verdict:

These blondies were nice and chewy and were packed full with add-ins. Mine turned out to be quite chocolatey, from the generous quantity of chips, the chocolate in the Heath bar and in the chocolate-covered cocoa nibs that I'd used, and I found myself wishing I could taste more of the blondie and less of the chocolate. The coconut added a subtle, but nice, note. Overall, I prefer the "Killer Blondies" from the kitchn's recipe (minus the topping), but I liked these blondies very much.

Tuesday, July 20, 2010

{TWD} Baby (Basic) Banana Cake


The official name of this week's recipe for the Tuesdays With Dorie baking group is "Lots-of-Ways Banana Cake" because Dorie Greenspan gives, well, lots of different ways to bake, fill, frost, and/or serve her recipe for banana cake. I've got to admit that despite all of the available options I baked a very plain version of this cake, and a tiny one at that, hence my name for it: Baby Basic Banana Cake.

n.o.e.'s notes:

- Kimberly of Only Creative Opportunities chose this week's recipe and you can find the recipe for the cake on her blog.

- I baked 1/8 recipe in a smallish loaf pan.

- At first I was a bit dubious about this cake; I had loved Dorie's Classic Banana Bundt Cake (that I posted here) so much that it was hard to imagine how this recipe could stack up to that one.

- Although I'd love to taste this cake baked with coconut milk and toasted coconut in it, my main taster - my husband - is anti-coconut, so I baked a coconut-free version.

- Since the quantities of ingredients were so small for 1/8 recipe I didn't use a mixer but just creamed and stirred with a big spoon by hand.

- For liquids I used a creamy thick plain yogurt, the optional rum, and a double quantity of vanilla extract.

- 1/8 recipe fits into a pan with an area of 15 or 16 square inches. I used a 3"x5" loaf pan, which I greased and floured, then lined with a parchment sling so that the cake would easily release from the pan.

- The little cake took around 27 minutes to bake.

- Rather than fill or frost the cake, I sprinkled it with powdered sugar and served it with vanilla ice cream. It would be great with whipped cream and toasted walnuts, too.


the verdict:

This cake turned out to be a wonderfully fluffy, soft yet moist, cake-ish version of the best banana bread you've tasted. We enjoyed it with vanilla ice cream; perfect for a hot summer evening. My husband rated this one an "11" on a scale of 1-to-10.

Here I'm going to sound like a broken record: I don't know why I ever doubted Dorie. She definitely knows her way around banana cakes. I loved this cake nearly as much as her banana bundt cake. In fact I'd need to taste them side by side to see which one I like better.

If you have any love in your heart for banana baked goods, this is a recipe to keep in your back pocket. Thanks, Kimberly for a great pick this week!

Thursday, July 15, 2010

Minnie Lane's One Pot One Pan Butterscotch Brownies


Today is my two year blog anniversary, and to celebrate I'm giving all of you a little gift: an old family recipe for blondies, or as we always called them, butterscotch brownies.

My husband's grandmother, Minnie, lived to age 90 and was quite the character. Opinionated, feisty, and outspoken. She was also thrifty and handy, she sewed clothes for herself and her daughters, and was an excellent cook. I have a few of her recipes, and the one that I make over and over is her Butterscotch Brownies, which combine ease of preparation with chewy texture and meltingly sweet taste.

These blondies don't have any baking chips stirred in; instead they get their butterscotch-y goodness from butter and dark brown sugar. The other virtue of the recipe? It can be made with a minimum of fuss and dirty dishes. Using a good digital kitchen scale, you can whip up a batch of blondies with a cooking pot, a spoon, a measuring spoon, and a baking pan!

the recipe:

Butterscotch Brownies

1 stick butter (115 g, 4 oz)
2 cups firmly-packed dark brown sugar (350 g, 12.25 oz)
2 eggs (100 g without shell, about 112g including the shell)
1 3/4 cups all-purpose flour (212 g, 7.5 oz)
2 tsp baking powder
1 tsp vanilla

1. Preheat oven to 325 degrees.

2. Butter and flour a 9" x 13" baking pan.

3. In large saucepan, melt 1 stick butter. Stir in remaining ingredients in order listed above.

4. Spread batter in the prepared pan and bake for 25 minutes. Brownies are done when a knife inserted in center of pan comes out clean.

5. Cool on a wire rack in the pan. When cooled, sprinkle with powdered sugar and cut into 1" squares.

Tuesday, July 13, 2010

{TWD} Brrrrr-ownie Ba-rrrrrs


Dorie Greenspan's book Baking From My Home to Yours is admirably comprehensive, but brownies might be the category best represented. No matter what your taste, there is a brownie to fit (unless of course you don't like chocolate!) This week's recipe for Tuesdays With Dorie is designed for mint lovers. Called Brrrr-ownies, the name indicates the frosty flavor contributed by peppermint patties stirred into the batter.

n.o.e.'s notes:


- Karen of the blog Welcome to our Crazy Blessed Life chose the recipe this week - click over to her blog post to find it.

- I baked 1/4 recipe of the brownies in a small loaf pan, and cut the brownies in bars when cooled.

- Although the recipe call for unsweetened and bittersweet chocolate, I used a bar of 85% chocolate bar instead of the two other kinds. The way I looked at it, 85% is the average of the 70% bittersweet and the 100% unsweetened chocolate I would otherwise use.

- I'm getting spoiled by these easy recipes lately; this one used just one bowl.

- After 22 minutes in the oven my brownies registered done using the knife test.

- The brownies looked a bit alarming when they came out of the oven. Some of the peppermint patty pieces had erupted through the chocolate as the brownies baked.

- I chilled the brownies before cutting them. When I cut them, I could see how dense and fudgy they were. There were empty pockets in the baked brownies where the peppermint patty pieces had been before they melted and oozed elsewhere.


the verdict:

These brownies were chewy, fudgy, almost candy-like. Even though I rarely like the chocolate and mint combination, I loved it in this recipe!

To make the "brrrrr" part of this recipe complete, it would be fun to chop the brownies into pieces and churn them into a batch of ice cream. I might try that with the leftover bars that are currently in my freezer.

Tuesday, July 6, 2010

{TWD} Ooh la la! Tarte Noire and Paris


It's been quite an adventure being a member of the baking group Tuesdays With Dorie for the past two years, as we work our way through Dorie Greenspan's book Baking From My Home to Yours, one recipe per week. I've grown to love the cookbook. As Dorie explains on her wonderful website:
"My... book ... is my most personal, in that it's like a kitchen journal recording the recipes I made and the things I learned over 30 years of baking at home and in the kitchens of some of the best chefs in America and France."
The title of Dorie's book might have more accurately read "Baking From My Homes to Yours" because Dorie has a home in Paris as well as two in the US. She has worked with French chefs on both sides of the Atlantic and luckily for us, many French recipes have become part of Dorie's "home" baking, and through the book, they can be part of our home baking also!

One such recipe is the Tarte Noir, which has become a favorite in our home. It is one of the first recipes that my daughter JDE baked two summers ago when she bought the book. Her tart was elegant in appearance (unfortunately there are no pictures of that tart, as it was before my blogging and TWD days) and, truly, nothing that sublime had ever come from my kitchen. A buttery and sweet crust combined with a velvety chocolate filling made for a perfect dessert. JDE baked it for a meeting of my book group. The general consensus of the members was that my daughter should go into the baking business!

This week my very good blogging and baking friend Jessica (aka Dharmagirl), of the blog bliss: towards a delicious life, got to choose the recipe for TWD. She recently returned from a trip to Paris, and chose the Tarte Noir as a way to celebrate her experience there. Jessica's choice turned out to be perfect timing for me, for two reasons. First, JDE had just come home from college and in a turnaround, this time I baked the tart for her.

Chocolate tarts in the window of Maison du Chocolat in Paris (sorry about the terrible photo; no inside photography was permitted)
Second, a few days after baking the tart, JDE and I traveled to Paris. We left that fabulous city yesterday after enjoying a wonderful week there. We stayed in the 6th - Dorie's neighborhood - and had a great time pretending it was our home too. There's a lot to love about Paris, but I have to say it was a special thrill to see chocolate tarts in right there in the bakery cases! Of course we had to sample the Parisian variety and see how it compared with the home-baked version. I've included some of our pictures of Parisian chocolate tarts.

Chocolate tarts (both noir and milk chocolate) in the pastry case at Bread and Roses in Paris.
n.o.e.'s notes:

- If you'd like the recipe for this tart, you'll find it on Jessica's post.

- Here are my notes about the tart I baked.

- I'd already enjoyed this tart with Dorie's fabulous crust, when my daughter baked it. This time around I decided to experiment with a gluten-free coconut crust. I adapted the crust I used for the ice cream pie (posted here) by adding an egg and blind baking it. Dorie always says that she dislikes an underbaked crust; she'd be very proud of me because mine was baked to a deep toasty brown color.

- Rather than a full-sized tart, this time I made a partial recipe and baked three small, deep, individual tarts.

- I used Callebaut bittersweet chocolate, which I love to use in baking. I think a very dark bittersweet chocolate would be good in this tart also.

- For some reason, this time my chocolate ganache wasn't very smooth. I probably should have thinned it a bit with some more cream. My tart doesn't have that coveted (by me at least) smooth, glassy-sea appearance, but luckily the deficiency was only cosmetic; the ganache tasted as great as ever.

- The chocolate caramel tart that we baked for TWD last year (posted here) is nearly the same recipe, with the added attraction of a caramel layer and salted nuts. It is one of my all-time favorite recipes!

My daughter and I split this chocolate tarte noir as a dessert after a lovely lunch at Bread and Roses in Paris. That is a bit of edible gold leaf casually placed on top!

the verdict:


The little tart tasted like a coconut cookie with a creamy, chocolate-y filling. The rustic coconut was a perfect counterpoint to the smooth perfection of Dorie's chocolate ganache. Every time I make this ganache it takes my breath away!

And the chocolate tart we had in Paris? Here's JDE's verdict:

My impressions of the Parisian chocolate tart: The chocolate filling was extremely similar to that of my home-baked tart! The crust was good, but I prefer Dorie's recipe. Thanks, Dorie, for making this French classic (and many others as well) achievable to ordinary home cooks, no matter where our homes are! And thanks to Jessica for this fabulous pick this week.

Tuesday, June 29, 2010

{TWD} Lemon-Drenched Lemon Cake


When I was in high school I had a steady babysitting job - nearly every Saturday evening found me taking care of three adorable children and I even took some vacations with them. I have many fond memories of that family, including some very strong food associations. The mother baked fresh braided loaves of Challah bread every Friday, and there were always cold Tab sodas and Chips Ahoy cookies in the fridge, and a Sara Lee pound cake in the freezer. Invariably we'd slice and eat the cake frozen. I loved its tight crumb and the fact that it never ever tasted dry. Dry pound cake is just a shame, isn't it?

The recipe this week for Tuesdays With Dorie is called Rum Drenched Vanilla Cakes (I baked the lemon variation). Dorie Greenspan compares this cake to the texture of a Sara Lee poundcake.

n.o.e.'s notes:

- Wendy of Pink Stripes chose these cakes for us this week. You can go visit her blog for the recipe. Her site is always worth a good browse; Wendy is one of my favorite baking buddies and she always features yummy sweets (including fabulous ice cream!) and wonderful veggie dishes. It makes sense that if Wendy didn't choose an ice cream recipe, she'd pick one with alcohol. Next time, Wendy, I'm going to try this cake with the rum in it.

- Although I love rum in my baked goods, given the very hot weather we've had in these parts this June, lemon sounded perfectly refreshing, so I chose the lemon variation. This meant reducing the rum and vanilla and including lemon zest in the cake and lemon juice in the syrup that soaks the cake after it's baked.

- I baked 1/3 recipe, which I split between a smallish loaf pan and a baby loaf pan. I drenched the baby one with syrup for tasting and kept the larger one plain so that I could pop it into the freezer.

the verdict:

My cake wasn't as dense or as moist as a Sara Lee pound cake. Nor was it as lemony as I would have liked. I'd definitely increase the lemon presence if I were to make it again, maybe adding lemon extract to the batter and the syrup. Or I'd skip the lemon and go for the rum version. Thanks, Wendy, for a fun and easy pick this week!

Friday, June 25, 2010

{TWD} Dressy Chocolate Loaf


Sometimes the recipe names in Dorie Greenspan's book Baking: From My Home to Yours are perfectly straightforward (Molasses Spice Cookies, French Pear Tart, Sweet Cream Biscuits), and sometimes they are a bit more of a puzzlement. This week's Tuesdays With Dorie selection is a case in point: Dressy Chocolate Loaf Cake. Some of those words - "dressy" and "loaf cake" are not usually found together.

So this week's recipe presented a semantic mystery. Is the cake truly dressy as compared to all cakes? Or is it merely dressy as far as loaf cakes go? Only one way to find out - bake it up and see!

I decided to serve this one to my book group. As a collection of people they are remarkably versatile in the dressiness department. On any given evening most of us will be in jeans but at least one of the men will be in a suit and tie from working late. At times members have come from or been on the way to cocktail parties or fancy dinners. Our desserts have been similarly varied. We've sampled fancy tarts and rustic pies. I've run the gamut of my decorating experience (sort of dressy to very casual) in cakes I've baked for my book group.

No matter which type of "dressy" this week's cake would end up being, I knew it would fit in fine with our group.


n.o.e.'s notes:

- Amy of Amy Ruth Bakes chose this cake for the TWD group to bake this week. You can find the recipe on her site.

- I was very indecisive about kind of cocoa powder (the recipe didn't specify) so I used part natural and part very dark alkalized

- Instead of the loaf pan that Dorie specified, I used my long slim loaf pan, which has equivalent volume but different dimensions. As it baked, the cake rose a lot and filled the pan.

- When assembling this cake I was beset with misgivings. I'm not a huge fan of sour cream flavor, but I like it in some things. I was cautiously optimistic about the frosting. That is until I tasted it, and didn't really care for the flavor, at which point I got a bit worried.

- The other area of uncertainty was the filling. The recipe specifies splitting the loaf lengthwise and spreading raspberry jam between the layers. Despite what feels like a neverending supply of jam jars in my cupboards and fridge, I was unable to unearth any raspberry. Instead I chose a mild berry jam: cloudberry preserves from IKEA.


the verdict:

This was definitely dressy for a loaf cake, with its split, filled layers, and robe of frosting coating the top and sides. In the universe of cakes, however, it was fairly average in dressiness. But this cake was far above average in taste. The first bite brushed aside any lingering doubts I had about the various elements. This close-crumbed, moist, dark, chocolate-y cake paired beautifully with the jam filling and the sour cream frosting.

The book group agreed that this was a fine cake indeed. Perfectly dressy for a Thursday evening in summer!

Although I loved the combination of cake, jam and sour cream frosting just as it was, the cake also would be a great base for a variety of frostings. I had a few scraps of leftover cake with some peanut butter frosting and it was delicious.

I know this post is a few days late; I have been traveling and planned to write the post on Tuesday from the airplane. Except the plane didn't offer an internet connection.

Tuesday, June 15, 2010

{TWD} Raisin Swirl Bread


What a difference the baking group Tuesdays With Dorie has made in my kitchen! Nearly two years of steady baking, week in and week out, has made me comfortable with a variety of techniques and ingredients. The biggest transformation , however, has been in yeast baking. My first ever yeast experience was a Dorie recipe (Kugelhopf, posted here) and I have no doubt that were it not for my participation in TWD I would never have attempted to bake with yeast.

Boy, am I glad that I did; I was bitten by the yeast bug and now I even have a separate blog devoted solely to my yeast baking. So I was pleased to see that the assigned recipe for this week is Raisin Swirl Bread. Raisin bread is a longtime favorite in our house, and the best version I've baked is a Peter Reinhard recipe from his book The Bread Baker's Apprentice (which I posted here). How would Dorie's compare?

n.o.e.'s notes:

- The recipe was chosen by Susan of the blog Food.Baby. You can find the recipe on her post.

- I made half recipe in a smallish loaf pan.

- Rather than active dry yeast, I used instant yeast. The conversion is to use 3/4 of the active dry measurement when measuring the instant yeast. The instant yeast doesn't need to be proofed, but rather is added with the dry ingredients.

- My favorite way to mix bread is by hand, but if I use a machine, I invariably use my food processor. I love the speed and precision of this method. It requires the ingredients to be mixed in a different order, but before long it really becomes second nature. First all of the dry ingredients (including the instant yeast) are combined in the food processor bowl. Then the liquid ingredients are added in a slow stream while the machine is pulsing. Continue to process the dough until it gathers into a ball, generally a minute of less. When the dough has been mixed/kneaded enough, it will register 77-81 degrees on an instant thermometer, and the dough will pass the "windowpane" test, meaning that it will be translucent when stretched between the fingers of both hands.

- Dorie's recipe calls for all-purpose flour, but I wanted bread with a sturdy crumb and some whole grain complexity, so I used a mixture of high gluten flour, oat flour, and white whole wheat flour. I added the optional nutmeg and orange zest to the dough.

- For the swirl, I used brown sugar with cinnamon and a very dark cocoa powder. After my buddy Di mentioned that she was leaving out the butter so that the bread wouldn't fall apart where the swirl was I decided to follow suit.

- I put the dough into the freezer for the specified 30 minute rest and set a timer. At the time I had a lot of other cooking and baking projects going in the kitchen - you know where this is going, right? - so when the timer rang I got distracted and promptly forgot about my dough. About 3 hours later I remembered the bread dough! At that point I moved it from freezer to the fridge for an overnight stint and the next day I formed and baked the bread.


the verdict:

When I sliced this bread, I gave a little gasp - it was so gorgeous! The swirl, with its plump raisins, looked like a string of beads. The bread had nice flavor and texture, but I have to say that it didn't unseat my favorite Peter Reinhart raisin bread. It was pretty good toasted, and I'm sure that Dorie's suggestion of French toast would be quite delicious. Also our host Susan made cinnamon toast with her bread and I'm going to try that out. Thanks, Susan!

Tuesday, June 8, 2010

{TWD} Strawberry Shortcake and Friends

Friends, Part 1

The minute that I learned that this week's recipe assignment for the Tuesdays With Dorie baking group was Tender Shortcakes, I was transported back to my childhood and the countless hours I spent with my friends skipping rope. Here is one of the jump rope songs we sang:
Strawberry shortcake, cream on top.
Tell me the name of your sweetheart?
Is it .......
[.....continue listing random names until the person jumping misses, and that is deemed to be the sweetheart's name]
To match the jump rope rhyme - and because I had fabulous berries in my farm box - I knew I had to make classic strawberry, although in my opinion almost any fruit and/or berry makes a fabulous pairing with shortcakes and "cream on top."

Friends, Part 2

Speaking of friends, until I began blogging two summers ago, I thought the concept of "online friends" was a little odd. But I found that my online baking groups are communities, and discovered some kindred spirits who have become actual buddies, partners in flour and sugar. Cathy, of the blog The Tortefeasor, is one of my favorite baker/bloggers. Despite a few (ahem) years difference in our ages, we discovered that we shared a lot in common in our backgrounds and interests. Cathy's posts never fail to make me laugh, even as I identify with her baking ups and downs (mostly ups these days - two years of weekly baking breeds a reassuring level of ability) The Tender Shortcakes are Cathy's pick and I am honored to bake them along with her!

Friends, Part 3

I enjoyed this dessert with the members of my book group. We started as acquaintances, and over nearly 5 years of twice-monthly meetings, we have become close friends who have shared in each other's lives as we share discussions of the books we read together. The group members have graciously served as recipe tasters for many of the Tuesdays With Dorie sweets that I bake, and they provide valuable feedback.


n.o.e.'s notes:

- To get the recipe for Tender Shortcakes, check out Cathy's post.

- I made 2/3 recipe and the math was simple!

- The recipe was easy to put together, and I followed it exactly as written, although Dorie gives great playing around options for the shortcakes and the filling, This time I wanted the classic. Well, truth be told, I did add a tiny pinch of cardamom to the dry ingredients.

- I was low on unsalted butter, so I used salted butter and cut the salt in the dry ingredients a bit.

- My shortcakes were much smaller than specified in the recipe, but they were still an average shortcake size. I think I ended up with a dozen or more.

- I'm pretty sure I did something not quite right because mine were lumpy and didn't rise very much as they baked. The directions said to split them before topping with berries and whipped cream, but mine were so flat - and crumbly - that there was no feasible way that I could have split them. I was a little distressed that I couldn't serve them as specified, but we just piled the berries and the cream on the plate with the shortcake and that was it.

C takes her first taste of the Tender Shortcake!
the verdict:

My book group assured me that there was no reason to fret about un-split crumbly shortcakes - these were delicious! More than one group member ate more than one shortcake. JT had both of his shortcakes topped only with whipped cream, explaining that they were perfect so there was no need for berries! His wife, AT, loved the shortcakes, especially since they reminded her of shortcakes that she'd enjoyed as a child. Our host couple's daughter C agreed to demonstrate her reaction for the camera (see pictures, above and below).

We split up the leftover shortcakes, and my husband enjoyed them for dessert. It was a sad day indeed when he asked "do we have any more of those shortcakes?" and my answer was "no"...

Many thanks to my friend Cathy for choosing a classic recipe - and a delicious version at that - that is perfect for sharing with friends.

C delivers the verdict!

Tuesday, June 1, 2010

{TWD} White Chocolate Brownies


I have a confession to make: for a long time I've had a bad attitude about Dorie Greenspan's recipe for White Chocolate Brownies in Baking: From My Home to Yours. I don't like the sickly-sweet taste of white chocolate, so the prospect of white chocolate brownies was just plain unappealing to me. But then I'd reason with myself: "Self, don't forget this is Dorie Greenspan's recipe. You've been pleasantly surprised many times by her recipes; as recently as last week's coconut banana ice cream pie. Maybe, just maybe, you'll like these when the time comes to bake them for Tuesdays With Dorie."

The brownies were finally chosen for this week and I stepped up and baked them, hoping to be proven wrong in my prejudgment of the recipe.

n.o.e.'s notes:

- My opinion of the brownies is no reflection of my feelings about Marthe of the blog Culinary Delights who chose the recipe this week. Marthe is an enthusiastic and generous member of Tuesdays With Dorie, and her blog is filled with yummy treats. Luckily she loved the brownies, and she gives some very helpful tips in her post (along with the recipe).

- My hopes were raised when I was that there was a surprisingly little amount of white chocolate in the brownie recipe, and a lot of orange zest in the batter, which made the brownies smell delicious as they baked.

- A full recipe would fill a 9"x13" pan. I decided to use two 8" square pans - so the brownies would cook more quickly in the middles and release from pans easily. I baked these early, before this week's P&Q was posted, but I somehow suspected that doneness - or rather, underdoneness - would be an issue. I also lined my pans with a parchment sling so that I could remove the brownies from the pan without stickage.

- The recipe calls for ground almonds and I used almond flour/meal from Bob's Red Mill. It's more finely ground and fluffy than I've been able to achieve in my food processor. Plus, it's made with blanched almonds, so it's a lovely pale golden color.

- I was tempted to use a swirl of jam rather than berries (doesn't that sound good?) but I dutifully used the specified raspberries (exactly 20 of them).


- My meringue layer turned out to be unexpectedly thin when I spread it over the brownie batter.

- It took absolutely forever for the brownies to get baked. I kept putting them back in oven for another 5 minutes. On the bright side, testing the brownies wasn't as hard as I thought it would be the knife went through the meringue layer and tested the brownie layer .

- I thought the brownies looked so pretty when I cut them - the deep red raspberries punctuating the creamy yellow crumb. I piled them on a platter with some other brownies and brought them to a neighborhood dinner gathering. Unfortunately we were not able to stay at the party, so I don't know how well they were received. I kept out a couple of brownies to photograph the next day.

- Unfortunately the meringue didn't hold up for long, and when I photographed the brownies it was a bit weepy.

the verdict:


I bit into a brownie with trepidation, and ...it was much tastier than I had expected. The orange flavor and the raspberry notes were nice and strong, and the white chocolate was all but undetectable. Although the brownies tasted nowhere near as bad as I was expecting, mine had an odd spongy dense texture which I did not enjoy.

Sunday, May 30, 2010

Provencal Tomato Soup


What do you do when you have a surplus of fresh tomatoes? I often make either a quick or a long-simmering tomato sauce. In the summer my default plan is gazpacho. But the last time I had an overstock of tomatoes on my counter, I was in the mood for a different kind of soup. I searched my cookbooks and found a promising candidate - a soup with the herbal flavors of Provence.


n.o.e.'s notes:

- The recipe is from The Splendid Table's How to Eat Supper

- I used fresh tomatoes. The author is very clear that Roma tomatoes are not good to use for anything, and recommends using the best tasting fresh tomatoes available, or good quality canned.

- The recipe's ingredient list specifies dried herbs. It was quite tempting to substitute fresh herbs from my little garden, but I didn't. Boy was I glad when I turned the page and found this note:
"Resist substituting fresh herbs for the dried ones called for here. They should be dried (but never powdered), just as they are in Provence's famous blend, herbes de Provence. The ready-made blend is often stale. Here you will be making your own."
- I removed the skins from my fresh tomatoes by immersing in boiling water for 1 minute then immediately putting them into an ice bath. After that the skins just rub off easily.

- I was a bit leery of the cinnamon in the recipe and used less than half and it was almost too much.

- At the end, goat cheese is stirred into the soup. I had a lovely seven-pepper-encrusted goat cheese from the farm box, which added a bit of spicy heat to the soup.

- The recipe has a variation where the dried herbs are replaced by fresh basil, and I plan to try that next time.


the verdict:

This was an unusual take on tomato soup, and I enjoyed every spoonful. The cinnamon nearly ran away with the soup, though, so next time I would add only the smallest pinch, then adjust to taste.

the recipe:

South of France Tomato Soup with Young Chevre
from The Splendid Table's How to Eat Supper

generous 1/2 tsp dried basil
generous 1/2 tsp fennel seeds
generous 1/2 tsp dried oregano
generous 1/2 tsp dried thyme
extra virgin olive oil
3 med onions, finely chopped (I used about 9 ounces)
salt and freshly ground black pepper
3 large garlic cloves, finely chopped
generous 1/4 cup tomato paste
1/3 cup dry vermouth
2 pounds good tasting tomatoes (not Romas), peeled, seeded, and chopped, or one 28-ounce can whole tomatoes with their liquid, crushed
approximately 28 ounces of broth and 2/3 cup water
1/4 tsp ground cinnamon, or to taste (I used 1/8 tsp of Vietnamese cinnamon, and would use less next time)
4 ounces fresh goat cheese, crumbled

1. Combine the dried herbs in a small cup. Crush them lightly until they become fragrant. Set aside.

2. Film the bottom of a 6-quart pot with olive oil. Heat over medium-high heat. Stir in the onions, season with salt and pepper, and cook until the onions are golden brown, 5 to 8 minutes, stirring often. Add the reserved herbs and the garlic. Continue cooking until their aromas open up, about 30 seconds.

3. Blend in the tomato paste until there are no lumps; then add the vermouth and tomatoes. Boil for 2 minutes. Pour in the broth, stir, adjust the heat to a light bubble, and cover the pot tightly. Cook for 20 minutes. Then blend in the cinnamon, and taste the soup for seasoning.

4. Ladle the soup into bowls, and top each serving with crumbles of goat cheese.

Tuesday, May 25, 2010

{TWD} Coconut Banana Coconut Ice Cream Pie


When the May recipe selections for the Tuesdays With Dorie baking group were announced, I puzzled for a minute or two about the Banana Coconut Ice Cream Pie, but then I had the perfect plan: the folks at my gym are crazy about coconut things (whereas my husband, who generally loves ice cream, definitely is not, nor are my book group members) so I decided I'd make this one for an upcoming party at the gym. In order to fit my tasters, I adapted it to be gluten-free, and I decided to up the coconut factor too; if I'm going coconut, I might as well go all out.

n.o.e.'s notes:

- The pie was chosen by Spike of the blog Spike Bakes. You can find it on her blog post.

- There's actually no baking involved in this recipe, which makes it perfect to make - and eat - for hot weather. The pie has a press-in toasted coconut crust and an ice cream/banana filling, along with some sliced bananas in the middle and on top. I decided right away to skip the banana slices but keep the mashed bananas in the ice cream filling.

- The pie's filling is made with premium-quality ice cream that is whirled in the food processor with some mashed bananas. Dorie calls for chocolate ice cream but luckily gives her permission to choose an alternate flavor. Chocolate + banana is still not my preferred combination, so I decided to churn some coconut milk ice cream for this pie. I wanted a creamy, custard-style ice cream, and started with this this recipe and made several changes in ingredients and method - scroll down to the end of this post, below, to see the recipe for the ice cream I made. Because I used palm sugar (another coconut ingredient) my ice cream was a tan color. I wish I had some coconut extract because I would have used it. Oh, and the recipe called for rum, but I left it out. 6:00 am is rather early for pie, but definitely too early in the morning for pie with alcohol.

- Dorie's crust contains butter, toasted sweetened shredded coconut and crushed butter cookies. I used unsweetened coconut flakes which toasted to a deep golden color and crunchy texture. To make the crust gluten-free, I skipped the cookies and added an equivalent volume of almond meal and toasted pecan pieces. I also added a bit of palm sugar to make up for some of the sweetness from the lost cookies and my unsweetened coconut. It's worth being a little sloppy when pressing the crust in the pie pan, because the crumbs are scrumptious!

- My pie looked a little naked (no bananas on top) so I wish I had toasted some extra coconut for garnish. Actually, I think that whipped cream and toasted coconut would have been pretty good as a topping.


the verdict:

The filling was smooth and creamy and just a little sweet, with hints of banana and coconut. The real star of this dessert was the crust: it had a surprisingly complex combination of tastes and the well-toasted coconut and pecans ensured a crispy crunch.

People seemed thrilled with the pie, and we kept having to cut smaller and smaller slices to make it stretch as folks came into the gym, until it was all gone except for a few crumbs of crust (the best part!)

I'd love to try this recipe again with different flavors of ice cream, maybe sans banana; Spike made a version with coffee ice cream, my favorite flavor, which sounds fabulous. I also think the crust would pair well with chocolate. Or possibly make the crust all by itself, just to nibble on...

the recipe:

Coconut Milk Ice Cream
my adaptation

4 egg yolks
scant 1/2 cup palm sugar
pinch of salt
2 (13.5- ounce) cans regular coconut milk
2 teaspoons vanilla extract (or coconut extract)

1. In a large bowl, whisk yolks, sugar, and salt together until pale yellow, 1 to 2 minutes.

2. Heat coconut milk in a medium heavy bottomed pot over medium heat until simmering.

3. Have an ice bath ready, big enough to fit the pot.

4. Pour the hot coconut milk into the egg mixture in a slow stream, whisking constantly, to temper the eggs.

5. Scrape the liquid back into the pot and cook over medium heat, stirring constantly, until just thickened and mixture coats the back of a spoon, leaving a track when you run your finger along the spoon. It should register 65-70 degrees C. on a digital thermometer. This can take up to 7 minutes but start checking temperature almost immediately. Be sure not to let the mixture boil.

6. Remove pot from the heat and stir in vanilla.

7. Transfer contents of pot to a bowl and chill until cold, preferably overnight.

8. Process mixture in an ice cream maker according to manufacturer’s instructions then transfer to a container with a lid and freeze until firm, at least 2 hours more.