Pages
▼
Tuesday, September 30, 2008
{TWD} Madame Crème Brûlée comes to Tea. . .
. . . with Earl and Lady Grey. A delicious time was had by all.
Cooking notes:
- I chose the tea variation listed under "Playing Around" on page 394 of Dorie's book.
- I made 2/3 recipe because I had 2 egg yolks already in the fridge. This involved a good bit of calculating. Thank goodness for my digital scale that has grams! Here are the quantities I used: 211 grams cream, 1/3 c. milk, 2 yolks, 42 grams sugar, 1 1/3 tsp vanilla.
- I used 2% milk because that's what we have. It worked fine.
- The dogs were a big help with photography.
- In planning for the tea variation, I was very tempted to use Green Tea Mojo but in the end I went with Dorie's recommendation of Earl Grey. Actually, I used a mixture of Earl Grey and Lady Grey tea, freed from their teabags. I lightly ground the tea leaves with a mortar and pestle to release the oils (bergamot orange and lemon). For future reference, 3 teabags = approximately 1 T. loose tea.
Following Dorie's instructions, I warmed the milk to a boil, then steeped the tea for 4 minutes. Or thereabouts. I set the timer incorrectly, so have no idea how long it really steeped.
Next, I strained the tea-milk through cheesecloth. I could likely steep the tea right in the teabag, and eliminate the straining step...
Then the tea-milk is brought to a boil with the cream.
The tea-milk/cream is then added to an egg/sugar/vanilla mixture (which I forgot to photograph).
Rapping the bowl on the counter did not actually dislodge those bubbles, btw. I popped a bunch of them with my (clean) fingers once they were in individual dishes.
I strained the crème into 4 teacups, ending up with about 3/4" liquid in each.
They baked in a 200 degree oven for approximately forever. I truly lost track of how many times I reset the timer. It was maybe 90 minutes total(?) Testing them for done-ness was really tricky. They jiggled with wild abandon. Plus a dark layer (from the tea I suppose) rose to the surface and obscured what was happening beneath. That dark layer later became a skin even though I covered the surface with plastic wrap.
They firmed up nicely in the refrigerator, and it's possible that they could have had less oven time. I went from worrying that they would be raw in the center to worrying that they would be overdone and rubbery.
What I should have been worrying about was caramelizing the sugar. That's when things got ugly.
Caramelizing adventures:
Part One
I decided to use the approach so kindly explained by Sweetcharity in the this week's P&Q section. Being a bit insecure, I also googled the method, and came up with specific directions on how to caramelize sugar.
I wanted to use natural demarara sugar, brushing away those lingering doubts about knowing when it would have darkened since the sugar was already brown. I also dedicated a cup of sugar to the task, since by now I've gathered that there's such a thing as working with too little sugar (who knew?)
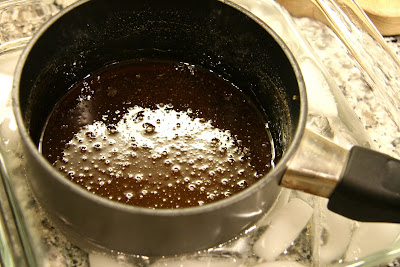
Everything was going swimmingly, but I must have let my sugar syrup progress too far, or I cooled it incorrectly. But it got really thick and my attempt to pour and swirl became glop and drop. It did harden, but was pretty thick. We were on a really tight dinner schedule, so I abandoned ship on the caramelizing, stopping after one teacup. My husband and I ate ours without the sugar crust. He said he preferred it that way. Awww, thanks, honey. My mom gave me half her (thick) sugar layer. I was glad to taste it that way, but I honestly preferred it as a custard, too. Or maybe I was just mad at the sugar.
Part Two
I had one remaining teacup of custard, and after a good night's sleep, I decided to go for the broiler method. Visions of four cracked teacups had prevented me from attempting this earlier, but at this point I was willing to sacrifice one teacup for the cause, if it came to that. So I prepared the ice bath and set the cup on it. Dorie explains that this can take from a few seconds to a few minutes under the broiler. It was minutes and minutes for me. I think it's because the custard was so far down into the cups - I just couldn't get it close enough to the broiler. I held it up right to the coil (yes, with my hand in an oven mitt), and eventually (after changing the ice twice) it bubbled. I would have liked it browner, but beggars can't be choosers.
The custard was ever so slightly melty, but my teacup survived a good 10 minutes of broiler time. Snap that photo, and done! I'll have to say it tasted great with that little layer of sugar on top.
The Verdict:
I served this when my mother came to dinner. Crème brûlée is her favorite dessert and Mom has always been a lover of tea. Turns out that Earl Grey is her favorite tea!
These tasted divine - the tea was subtle but present. Luckily they were not rubbery! There was a dark skin on the creme, but it didn't detract. The color was lovely, and the turbinado sugar was a great complement in color and flavor.
The dessert was richer than Croesus, however. (I'd wonder how it would be with using more milk and less cream?) In the end, even though I licked the spoon dry, and even though several of the variations look cool, I don't really anticipate ever cooking this again.
My mom said that when she visited Japan she had tea custard. That might be cool to check out. Here's an intriguing recipe.
Here are some of the also-rans in the tea drawer. We are big tea-drinkers, and this is just the tip of our tea stash iceberg.
This classic dessert was chosen by Mari of Mevrouw Cupcake. You can find the recipe on her post, or on page 393 of Dorie's book, of Baking From My Home to Yours. If you want to see some truly beautiful and creative interpretations of Crème Brûlée, go check scores of other bakers' blogs on the TWD blogroll.
Monday, September 29, 2008
{Cooking Light Night} Crust-less Spinach quiche
"Leeks?"
"Here"
"Eggs?"
"Check"
"Spinach?"
"Right"
"Tomatoes?"
"Yep"
"Swiss cheese?"
"Check"
"Asiago cheese?"
"Yes"
"Cheddar cheese?"
"Right"
"Lardons?"
"Here!!!!!!!!!"
Perfect attendance. My favorite savory ingredients, all present and accounted for. Oh, and cottage cheese, the reason I chose this recipe, also "here." I'd found some fancy organic nonfat cottage cheese in the fridge (left behind by daughter J.D.E), and I was looking for a way to use it up. My husband was away, so quiche would be a perfect dinner for me. He's not a fan of quiche and I love it.
Cooking Notes:
- I used leeks instead of onions.
-I added a few halved cherry tomatoes to the onions in the saute pan.
- I used 1/2 cup of Benton bacon lardons instead of the turkey ham.
- I used fancy cave-aged Emmenthaler swiss cheese and fancy aged sharp cheddar cheese to go with my fancy bacon. I used Asiago cheese to sprinkle in the bottom of the pan. All the cheese I used was full fat.
- I used a tiny bit of olive oil instead of cooking spray for the saute pan and the baking pan.
- I used 1/4 c. Greek yogurt and 1/4 c. skim milk instead of evaporated milk
- I would have used egg substitute but I was out of it. I've used it before in quiches and it turns out very well.
- After layering the cheese and the bacon/leek/tomato mixture, I combined everything else in the food processor except the spinach and the swiss cheese. I added the spinach at the end and just pulsed an additional second or two. Then I stirred in the swiss cheese (I like cubes of swiss in my quiche).
- I used my wonderful new 7 3/4" tart pan with tall sides. This recipe can also be baked in individual servings in muffin tins.
- My quiche was taller than the original recipe, so I baked it in a cooler oven than specified, and for a longer time.
The Verdict:
Because of the flour in this dish and the bed of shredded cheese, it sort of makes its own crust. I really didn't miss the usual quiche pie crust at all. This quiche had great texture and flavors - very creamy rather than custard-y as a more traditional quiche would be.
I'm glad I used my tall tart pan, which is smaller in diameter than the specified 9" pie pan. I wanted a taller quiche with lots of interior volume, and it worked. This pan is my new favorite. (I originally bought this pan to bake Delia Smith's Deep Lemon Tart. Mine is smaller than the pan size she specified, so when I finally get a chance to try the lemon tart, I'll be pro-rating that recipe to the volume of this pan.)
The quiche was VERY savory. The Benton bacon has quite the hickory-smoked assertive flavor, and the lardons threatened to overpower the taste buds but the sharp cheeses held their ground. Barely.
The way I cooked this recipe, it lost some of its "light" qualities because I didn't use low fat shredded cheese (I don't really like it). In the future I could cut back the fat content by using egg substitute (which I was out of) and possibly a smaller quantity of cheese and bacon. In fact, I think I'd skip the cheddar and focus on the swiss-type and parmesan-type.
This quiche was my dinner for three nights, and I really enjoyed it. I had an extra large portion the first time, but the others were fairly average, imo. The recipe says it makes 8 servings, but if you're having it for dinner, I'd say 4-6, depending on your side dishes (and your appetite).
Thanks again to CB of I Heart Food4Thought for giving permission to use her "Cooking Light Night" logo.
{Cooking Light Night} = a great idea!
CB, of I Heart Food4Thought, has created this logo for her very own personal blog event. Her goal is to prepare a recipe from Cooking Light about once a week, and voila: Cooking Light Night! She has graciously given permission to use her logo for our own Cooking Light Night (if we link back to her). Thanks, CB! I've made several Cooking Light recipes recently - all winners, too (see: here, here, and here), and I look forward to frequent Cooking Light Nights on my blog.
Sunday, September 28, 2008
Dimply Cake, redux
Did I say how much we liked Dorie Greenspan's Dimply Plum Cake? :D
I thought it prudent to bake this cake again while I could still find fresh stone fruit at the market. Publix had very cute "Dinosaur Egg" pluots, so I picked up some for the dimply cake. I'd actually never heard of pluots before joining TWD (some people used them for the Summer Fruit Galette). These apricot/plum hybrids were absolutely delicious - a bit more intense in flavor than a plum, perfect for the hearty, rustic way I bake this cake, with lots of dark brown sugar and whole wheat flour.
Cooking notes:
I made 2/3 recipe again, but there were a few differences-
- I replaced the oil with half olive oil and half nonfat Greek yogurt
- I used orange zest with the cardamom (as specified in the recipe)
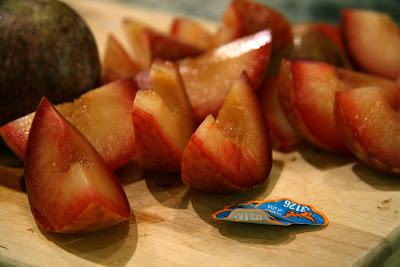
- The pluots were bigger than plums, so I cut them in fat wedges and angled them, with most of the skin side down. They cooked nicely.
The Verdict:
The cake is still delicious the third time around! The pluots were fabulous, maybe even better than the plums, and definitely surpassing the peaches. I didn't like the orange zest as much as the lemon, but my husband liked it better. I will be interested in trying lime zest sometime because I love limes.
{update, October 16, 2008: Yes, we love this cake. I made it again with pluots and lime zest and here it is - below - in all its glory!}
{update, Oct 28, 2008:
I've officially made this too many times to count; we love it for breakfast and I've been making it as long as I can find nice stone fruit in the grocery store. Here's how I've settled on making the cake:
1/3 AP flour, 1/3 white whole wheat, and 1/3 regular whole wheat
1/2 light brown, 1/2 dark brown sugar
for the oil: 1/2 plain yogurt, 1/2 extra light flavor olive oil
lime zest
plouts
I stir the sugar in with the dry ingredients
This is the only time that the fruit got "jammy" and it was fantastic }
Saturday, September 27, 2008
List o' sweets
I came across this Sweet 100 on food from books. It was created by Cakespy, and includes lots of ethnic and regional specialties. The ones I've eaten are in bold. Nearly all of the items on this list are links, so you can click and find out what they look like! Thanks, Cakespy, for all that work and such a fun list. I learned a lot!
1) Copy this list into your site, including the instructions!
2) Bold all of the sweets you've eaten!
3) Cross out any of them that you'd never ever eat.
4) Consider anything that is not bold or crossed out your "To Do" List.
So I've enjoyed about two thirds of these sweet treats - maybe a few more, like a flaming dessert (surely I have at some point but can't remember specifically) and the mock apple pie. I've either had Millionnaire's Shortbread or something very similar. I've had green tea ice cream but not cake. Hmm, I can't believe that Turkish Delight isn't listed. I don't know of a sweet that I wouldn't try...
How 'bout you?
- Red Velvet Cake
- Princess Torte
- Whoopie Pie
- Apple Pie either topped or baked with sharp cheddar
- Beignet
- Baklava
- Black and white cookie
- Seven Layer Bar (also known as the Magic Bar or Hello Dolly bars)
- Fried Fruit pie (sometimes called hand pies)
- Kringle
- Just-fried (still hot) doughnut
- Scone with clotted cream
- Betty, Grunt, Slump, Buckle or Pandowdy
- Halvah
- Macarons
- Banana pudding with nilla wafers
- Bubble tea (with tapioca "pearls")
- Dixie Cup
- Rice Krispie treats
- Alfajores
- Blondies
- Croquembouche
- Girl Scout cookies
- Moon cake
- Candy Apple
- Baked Alaska
- Brooklyn Egg Cream
- Nanaimo bar
- Baba au rhum
- King Cake
- Sachertorte
- Pavlova
- Tres Leches Cake
- Trifle
- Shoofly Pie
- Key Lime Pie (made with real key lime)
- Panna Cotta
- New York Cheesecake
- Napoleon / mille-fueille
- Russian Tea Cake / Mexican Wedding Cake
- Anzac biscuits
- Pizzelle
- Kolache
- Buckeyes
- Malasadas
- Moon Pie
- Dutch baby
- Boston Cream Pie
- Homemade chocolate chip cookies
- Pralines
- Gooey butter cake
- Rusks
- Daifuku
- Green tea cake or cookies ( I have had green tea ice cream)
- Cupcakes from a cupcake shop
- Crème brûlée
- Some sort of deep fried fair food (twinkie, candy bar, cupcake)
- Yellow cake with chocolate frosting
- Jelly Roll
- Pop Tarts
- Charlotte Russe (but I have had Bavarian Cream, which is a component)
- An "upside down" dessert (Pineapple upside down cake or Tarte Tatin)
- Hummingbird Cake
- Jell-O from a mold
- Black forest cake
- Mock Apple Pie (Ritz Cracker Pie)
- Kulfi
- Linzer torte
- Churro
- Stollen
- Angel Food Cake
- Mincemeat pie
- Concha
- Opera Cake
- Sfogliatelle / Lobster tail
- Pain au chocolat
- A piece of Gingerbread House
- Cassata
- Cannoli
- Rainbow cookies
- Religieuse
- Petits fours
- Chocolate Souffle
- Bienenstich (Bee Sting Cake)
- Rugelach
- Hamenstashen
- Homemade marshmallows
- Rigo Janci
- Pie or cake made with candy bar flavors (Snickers pie, Reeses pie, etc)
- Divinity
- Coke or Cola cake
- Gateau Basque
- S'mores
- Figgy Pudding
- Bananas foster or other flaming dessert
- Joe Froggers
- Sables
- Millionaire's Shortbread
- Animal crackers
- Basbousa
1) Copy this list into your site, including the instructions!
2) Bold all of the sweets you've eaten!
3) Cross out any of them that you'd never ever eat.
4) Consider anything that is not bold or crossed out your "To Do" List.
So I've enjoyed about two thirds of these sweet treats - maybe a few more, like a flaming dessert (surely I have at some point but can't remember specifically) and the mock apple pie. I've either had Millionnaire's Shortbread or something very similar. I've had green tea ice cream but not cake. Hmm, I can't believe that Turkish Delight isn't listed. I don't know of a sweet that I wouldn't try...
How 'bout you?
Friday, September 26, 2008
Fun with tomatillas!
After making chicken enhiladas verdes with jarred green salsa, I spotted tomatillas at the Publix. Time to try out home-made salsa verde! I followed the recipe at Simply Recipes - so easy - just pull the paper-y covering off the tomatillos, rinse them, simmer them for a few minutes with some peppers...
and then pop them in the blender with a some garlic, onion, cilantro, and a bit of the cooking liquid. Done! And delicious!!
We had friends over for dinner a few weeks ago, and this fresh salsa went into another batch of enchiladas. This time around I made the recipe as a casserole, covering the rolled enchiladas with the sauce (salsa verde whisked with Greek yogurt) and some shredded pepper jack cheese, and popped it all in the oven covered with foil. Just before serving, I ran the pan under the broiler to brown the cheese. I served the enchiladas with black bean and corn salad, homemade guacamole, and tortilla chips. Everything was so flavorful!
{Update November 19, 2008: I've now discovered a salsa verde/ enchilade recipe that I like even better! You can find the entry here.}
Wednesday, September 24, 2008
From one sunny clime to another: Greek Chicken
Foraging for Monday's dinner, I found 6 skin-on bone-gone chicken breasts in the freezer. Then came a recipe search. I wanted chicken with a crispy, tasty skin, but still relatively healthy (fried chicken was "right out".) And it had to be one that I could make without going to the grocery store.
The recipe I selected is from the Williams Sonoma book Meats & Poultry in the series "The Best of the Kitchen Library." I have to say that everything I've cooked from this book has been outstanding. The recipe, as written, called for 2 chickens split in half. Since I had boneless breasts, I had to adjust quantities and modify the recipe's techniques.
The recipe seemed perfectly appropriate for our very warm, sunny, dry (ugh, the drought continues) early Fall weather.
Greek Chicken with Oregano, (adapted from Williams Sonoma - update: the original recipe is at the end of this post)
6 boneless chicken breast halves, with skin (around 3 lbs)
1/3 cup olive oil
juice of 1 lemon
1 T. dried oregano
1 large onion (I used vidalia) cut into wedges
2 cloves of garlic, minced
salt and pepper
1/4-1/3 cup dry white wine
10 oz baby spinach, stemmed and washed
fresh oregano sprigs for garnish
1. Preheat oven to 390 degrees
2. In a small bowl, combine the olive oil, lemon juice, and oregano. Stir.
3. Brush the mixture on both sides of the chicken, and lay each breast skin-side down in a roasting pan.
4. Tuck onions and garlic among the chicken pieces, and sprinkle everything with salt and pepper.
5. Place in oven and roast for 10 minutes. Turn chicken skin side up, stir the wine into the pan juices, and baste the chicken.
6. Continue to roast until chicken is nearly cooked through, approximately 15 - 20 minutes. Remove pan from oven.
7*. Transfer chicken to plate and cover to keep warm.
8*. Place roasting pan on the stove top and reduce the pan juices over med-high heat until onions are slightly caramelized and juices are thickened to a sauce.
9*. Put chicken back into the roasting pan and place under broiler until skin is lightly browned.
10. Arrange a bed of spinach leaves on a platter and place the chicken on top. Arrange the onions and pour the sauce over all. Garnish with the oregano sprigs.
* Steps 7 - 9 are my additions. My version is a reduced proportion of lemon juice from the original recipe. In my culinary life, I have regretted using too much citrus juice but have rarely regretted using too little.
I served this with a side salad of chopped tomatoes, cucumbers, and onion, with fresh oregano leaves (from my herb garden!), salt and pepper.
The Verdict:
This chicken was absolutely fantastic. The oregano and lemon were a lovely combination, and the caramelized onions were delicious with the seasoned chicken. There ended up being a fair amount of liquid in the roasting pan, so I'm really glad I thought to reduce it. The resulting sauce was full of nicely concentrated flavors.
Since there are only two of us at home, I was able to freeze two batches of chicken for later.
Food in the freezer is like money in the bank... or these days maybe better!
{update} Here's the original recipe, slightly condensed because I got tired of typing. I wasn't able to find it online:
2 chickens, about 2 1/2 lb each, halved lengthwise
1/2 c (4 fl oz/125 ml) olive oil
juice of 2 lemons
2 T dried oregano
2 yellow onions, cut into wedges
4 cloves garlic, minced
salt and freshly ground pepper
1/2 c (4 fl oz/125 ml) dry white wine, or as needed
1 bunch spinach, stemmed and well washed (I'd use more for all that chicken)
4 fresh oregano sprigs
1. Preheat oven to 400 degrees
2. In a small bowl, combine the olive oil, lemon juice, and oregano. Stir.
3. Brush the mixture on both sides of the chicken, including under the wings, and place skin-side down in a roasting pan.
4. Tuck onions and garlic into the hollows of the chicken pieces, and sprinkle with salt and pepper.
5. Place in oven and roast for 20 minutes. Turn chicken skin side up, stir the wine into the pan juices, and baste the chicken.
6. Continue to roast, basting with the pan juices, until chicken is tender and the juices run clear when a thigh joint is pierced with a knife, 30 minutes longer. Add more wine to pan if necessary to keep chicken moist.
7. Arrange a bed of spinach leaves on a platter and place the chicken on top. Strain the pan juices and pour over the chicken. Garnish with the oregano sprigs.
Tuesday, September 23, 2008
{TWD} dimply plum cake
This week I was ambushed. By something called a Dimply Plum Cake. I never would have predicted that I'd like this cake, but it was the best thing I have ever put into my mouth! Yes, indeed, let's shout that from the housetops!
This is what makes TWD so great! Stepping outside the comfort zone can lead to surprising, even earthshaking, results. So forget the chocolate in this one, people! Try it with fruit. Heck, TRY IT WITH PLUMS. You might love it.
Part A:
I'm not really a "plum person". I don't buy them. I don't eat them. (But I don't dislike them either.) From the moment this recipe was chosen, I just *knew* that I'd be using peaches. I had a lot of beautifully ripe local peaches, and Dorie's suggestion of peach/lemon zest/chopped basil sounded intriguing. It was a foregone conclusion.
In truth, I wasn't really that excited about making this recipe. Well, I was happy to have a break from chocolate. and cookies! But plums? In a cake? What about those skins? Good thing I'd be using peeled peaches. It was with a sense of duty that I set about my baking preparations, planning for a half recipe (or less, depending what I might find in my drawer of baking pans)
I'd seen this cake on my jaunts out and about in the cooking blogosphere. I decided to check out some of the posts*. The plum ones really stood out. hmm. And every time I looked at the picture of Dorie's cake in the book, I was captivated. Those wonderful little plum halves dotted regularly in their pan beckoned me. hmmm. Then I went to the grocery store and found myself lingering at the plum display. I brought home 4 red plums...
I got to exercise the internet’s math skills as I calculated which of my pans would be equivalent in size to a half recipe. No, make that a quarter recipe. Yes, a quarter would be great. I had just the pan. Wait, it’s a better size for a third. So I did all the conversions of quantities to make 1/3 recipe, tied on my apron and began to measure butter. At that moment my husband wandered into the kitchen and said, “I love plum cake.” So I made 2/3 recipe.
Cooking Notes:
I...
- used part King Arthur white whole wheat flour and part AP flour
-used part dark brown sugar and part light brown sugar
-used zest of 1 lemon for 2/3 recipe
-used red plums. my plums were perfectly ripe - their skins were just about to get crinkly
-used Egg Beaters (my digital scale helped my get 1 1/3 egg's worth)
-used cardamom
-used 7 3/4 inch tart pan with removable bottom - perfect for 2/3 recipe
-pitted the plums by cutting them in half lengthwise (along the midline) and then twisting. This freed one half from the pit. Then I used a spoon to coax out the pit from the other half. I noticed that Deb of Smitten Kitchen just sliced the plums alongside the pit, so she ended up using pieces smaller than half the plum. I actually prefer seeing that indentation where the pit was, and enjoyed that extra bit of plum goodness.
-did not crowd my plum halves. I'd say based on my experience: go ahead and line your plums up close to each other. The plum flavor does not overpower the cake, and I think the cake would puff around the halves even if they were nearly touching.
-pushed the plums down a bit more about half way through the cooking time so that the cake would be sure to be dimply.
- forgot to add the sugar (although it was measured and sitting on the counter) until the cake was in the pan. I had to scrape the batter back into the mixing bowl and stir the sugar in. I was wary of overmixing the batter. You can see from the pictures that the batter was not fully mixed as it would have been had I added the sugar at the proper time. I think this ended up being a lucky accident.
- decided that this would be a great time to test out the new thermometer I'd bought to see if my oven temperature was properly calibrated. If you do this, be sure that you buy an oven thermometer and not a refrigerator/freezer thermometer. Otherwise you might discover your mistake after the freezer thermometer has been in the 350 degree oven for an hour...
The Verdict:
I loved the way the cake looked coming out of the oven. And with our first bites, my husband and I looked at each other and laughed. It was love. Love for Dorie. Love for TWD. And most of all, love for Dimply Plum Cake!
We were eating the very food of the gods. This rustic cake is indescribably delicious. The flavor is generally open and honest but the cardamom and lemon lend it just a touch of mystery. Of the dozen or so recipes that I've baked from Dorie's book, this one is our favorite! My husband said he didn't want to swallow each bite - it just tasted TOO good. He had two pieces the evening I baked it, accompanied by our homemade vanilla frozen yogurt.
1st day (pictures of the cake slices garnished with herbs): the brown sugar/cardamom flavor paired perfectly with the soft juicy sweetness of the plums. The white whole wheat flour and the darker sugar made my cake a bit more earthy and rustic. The cake had a delightful sandy texture, which I think came from the whole wheat flour and the unusual order in which I added the ingredients.
2nd day (pictures of the cake slices garnished with fanned plum slices): just as Dorie said - the cake softened but was still quite good. My cake stayed nice and moist.
My husband ate some for breakfast. After dinner that evening we polished off the rest of the cake and the frozen yogurt. And then it was gone. So I have no report of how the cake would have fared on a hypothetical third day.
The recipe's somewhat modest amounts of butter and oil, (and the EggBeaters I used) made it a relatively healthy dessert, at least by Dorie standards. And a fabulous choice to go with coffee in the morning. My husband commented at breakfast that the taste sensation of this cake is on the same level as some home-smoked kippered herrings we had at a fantastic inn in Scotland. Which is high praise indeed. But it not the same as saying the cake tastes like fish!
All three times my husband ate this cake with his eyes closed, just savoring the flavor. I am sure it was the cardamom that really gave this cake its edge. The thing I was most worried about - the plum skins - turned out not to be an issue at all. We could easily cut our bites with our forks.
Michelle of Bake-en selected this recipe, and I will always be in her debt. Thank you, thank you, thank you, Michelle!!! You can find the recipe on Michelle's post, or on page 41 of Dorie's book, of Baking From My Home to Yours. As always, go check out the cakes baked by the hundreds of other bakers on the TWD blogroll.
Part B:
I wasn't planning to make multiple variations of this recipe this week, but we loved it SO much, and I had ripe peaches that needed to be eaten, so a few days later I baked the peach/lemon zest/basil variation.
Cooking Notes:
I...
- baked just a half recipe.
- used 1 T. of chopped fresh basil for 1/2 recipe of the cake. We found that the flavor was barely detectable.
- used the white whole wheat for half the flour again, and dark brown sugar for half the sugar (again).
- substituted plain yogurt for half the oil. I do this with nearly everything I bake, and have always had good results.
- cut the peaches in eighths, and tried to space them as closely together as possible.
- this time I had more trouble figuring out when the cake was cooked through. I use a broom straw cake tester bundle, and it tested clean long before the cake was done.
The Verdict:
The peach cake was delicious, but didn't quite match the perfection of the cardamom/plum edition. The peaches and basil tasted nice together in the batter, but the basil flavor was not detectable enough in the finished cake to make a difference. I used fragrant basil from my herb garden, so I don't know what the story was.
I was able to follow directions this time, and I mixed everything in the correct order for the correct amount of time. (Yay!) The cake was not as rustic, and didn't have the delightful sandy texture. I think next time I make this, I will stir the sugar in at the end again, and see if I can replicate the coarse rusticity.
The moral of this story: I have recommitted to baking the challenges in this book. I've been pleasantly surprised, both minorly and now majorly. Plus, I've learned a bunch of great baking techniques.
*Palachinka (who made a chocolate version) lists a bunch of food bloggers who have made this cake (starting with Dorie herself):Dorie for Serious Eats, No Special Effects, Slow Like Honey, Smitten Kitchen, Tartlette, The Wednesday Chef, Vegan Diva, My Feasts, Cupcake Project, The Biscuit Pusher, TP, Cookie journey, Music and Cats, My Kitchen In Half Cups, Iz moje kuhinje, La cucina di Cristina, La Collina delle Fate...also, the Wednesday Chef
Sunday, September 21, 2008
Rocket Time!
On my first visit to London, I noticed that the English seem to be mildly obsessed with rocket, their catchy name for arugula. It is on the menu at nearly every restaurant in the city. For a fixed price pre-theatre dinner at Portrait, the restaurant at the National Portrait Gallery, I had an arugula salad and pasta with arugula (we had a choice between two dishes for each course) and both were fantastic.
But it wasn't until my husband and I vacationed in Berlin a year ago that I began to be preoccupied with arugula myself. We ate at Italian restaurants for at least 5 meals and I had a "rucola" salad each time. Upon our return home I found myself craving this peppery-flavored green.
I try to always have a stash of arugula/rocket/rucola/roquette in the fridge, and I make an arugula salad at least once a week. My method is simple: toss the arugula with a bit of my best olive oil - just enough to coat the leaves. Pile on a plate, top with shaved parmesan cheese and halved cherry tomatoes. I find that the sweetness of the cherry tomatoes pairs very well with the sharp pepper flavor of the arugula. The parmesan provides a nutty/salty presence. You can add salt and pepper to taste, and even some chopped garlic.
Sometimes I omit the olive oil, when I'm being really virtuous (not lately, however!) and it tastes almost as good. But mind you, I am one that really doesn't mind eating my salads without dressing.
This salad makes a great accompaniment to any Italian dish. We always have this when we eat pasta. This evening I used the last of the cherry tomatoes that a friend gave us from her garden.
I've ordered some arugula plants from my farm box folks, and I'll see how/if I can keep it alive indoors this winter. I'd imagine it won't be prolific enough for salad, but maybe for sandwiches and pasta and garnish.
A shot in the arm!
Thanks, Matt, for the blog award. I'll take an "E" for excellent any day, especially from a teacher! I enjoy reading Matt's blog, Matt's Kitchen, and have bookmarked a bunch of his posts for future cooking ideas. So it's cool to receive an award from him. Plus, he's put me in some pretty lofty company!
{update Sept 22: I've just heard from Michelle of Flourchild, and she's given me this award also! Thanks, Michelle and Matt!}
I've read the rules*, and am passing this award to:
1. and 2. - The first two blogs I am giving the award to are those of my two daughters, J.D.E. and A.L.E. Their blogs are private to friends and family only, so I won't post the links. I will say that both of these young ladies are clever and insightful as well as being true wordsmiths. Their posts are the highlights of my day!
3. Audrey of food from books. This blog is new and already makes for wonderful reading. Audrey is a literate and curious cook. Her pictures are simple and strong - love the b&w!
4. Barbara of Bungalow Barbara. I enjoy Barbara's cooking posts because she is precise and knowledgeable, and very inquisitive. She will explore alternate methods and ingredients, and is always happy to share her knowledge with the TWD group through the p&q post for each week's recipe.
5. Di of Di's Kitchen Notebook. Di is a dedicated blogger (she completed a TWD challenge while out of town for her sister's wedding!) and makes a delicious assortment of beautifully presented food. Love the notebook and love the blog.
6. Deb of Coffee, Cake & Chocolate. This is a non-TWD blog (the net widens!) that is absolutely stunning. This Kiwi cook makes gorgeous food and makes food look gorgeous. I want to sample everything on her blog!
7. Carol of Mix, Mix, Stir, Stir. Luscious baked goods and really helpful cooking posts are Carol's stock in trade. The photos on her blog are showstopping-ly beautiful and her writing is clear and informative.
8. Lindsey of Cafe Johnsonia. Lindsey's blog promises "COOKING*BAKING*TIPS*TUTORIALS*PRETTY THINGS FOR THE KITCHEN," and boy, does it deliver. What's especially cool about this blog is Lindsey's wonderful step-by-step photos of her recipes in progress.
Honorable Mention: Cathy of The Tortefeasor. I love Cathy's blog, which she began when she joined Tuesdays With Dorie (and quickly added The Barefoot Blogger cooking event). I'm excited to see that she's gotten bitten by the bug, and has actually posted about some non-challenge cooking! Thus Cathy's lucky readers get to enjoy even more entertaining writing and enticing pictures. I know that Cathy has already received this award from Laura, so here's an honorable mention. Cathy, you can just consider this a doubly-deserved award!
* The rules suggest passing this award to 10 blogs. But I won't care if you pass it to a few, to many, or to none at all. Basically, it's a compliment from my blog to your blog. If you do pass on the award, post about the blogs you picked, linking back to me and to them. Once you’ve posted, return here to let me know your post is up, and of course let your award winners know too. Some of you don't post awards in your sidebars; that's fine by me.
Thursday, September 18, 2008
Make it Quick: 5 Minute Tomato Sauce
I love a good tomato sauce on pasta. The simpler the better. Earlier this year, I tried Delia Smith's sauce, made from fresh tomatoes. It is easy and delicious, but takes a lot of stove top simmering until it is done. A perfect cold weather recipe.
Cookbook author Heidi Swanson, of the vegetarian recipe blog 101 Cookbooks, makes some extravagant claims about the superiority of this recipe for tomato sauce. Not only that, she asserts that it can be thrown together in 5 minutes' time.
Cooking Notes:
1. My crushed tomatoes, Hunt's Organic, were more of a puree in consistency. I would have preferred a less smooth texture.
2. I had a hard time getting the olive oil to incorporate with the tomato.
3. I used the zest from a very small lemon, and it was enough.
4. My sauce had a generous measuring of red pepper flakes, probably closer to 2 tsp., and had quite a kick.
5. The recipe is very quick; with the measuring and chopping, I'd say it took me 10-12 minutes. Can be made while the pasta water is coming to a boil.
6. I'd recommend that you zest your lemon away from the sauce pan. If you drop the lemon in the sauce while zesting, the sauce will splatter all over your kitchen. Trust me on this one.
The Verdict:
This was a fantastic addition to my busy-day-dinner repertoire. I served it plain, over whole wheat spaghetti, with an arugula and parmesan salad and hot crusty Tuscan bread. My husband gives the sauce a 9 out of 10. I agree. Next time I will use crushed tomatoes with a more rustic texture.
I've frozen the remainder for future uses. mmm, food in the freezer is like money in the bank!
I can see why Heidi says this sauce "is the little black dress of my cooking repertoire." I will make it again and again, but I'm not sure it will completely supplant Delia's sauce (or my mother's tomato sauce recipe, for that matter). Also, I want to try Chez Pim's 15-Minute Tomato Sauce.
Tuesday, September 16, 2008
{TWD} Round the globe with Chocolate Chunkers
Saturday, September 13 was International Chocolate Day. I celebrated by baking Dorie Greenspan's Chocolate Chunkers! The recipe called for a staggering variety of chocolate types. So I rummaged in my chocolate vault (and in the local Whole Foods) to assemble chocolates from many lands. Here's my international lineup:
Belgium
Callebaut semisweet
France
Valrhona Caraibe Dark 66%
Valrhona cocoa powder
Venezuela
El Rey Caoba Milk 41%
England
Green & Black's 70%
US
Ghiradelli premium white,
Scharffen Berger unsweetened
Callebaut semisweet
France
Valrhona Caraibe Dark 66%
Valrhona cocoa powder
Venezuela
El Rey Caoba Milk 41%
England
Green & Black's 70%
US
Ghiradelli premium white,
Scharffen Berger unsweetened
Would this cookie experiment be a model of international harmony or an exercise in global conflict?
With the amount (and expense) of premium chocolate involved, I found myself waffling about the add-ins. Part of me wanted to just go with just chocolate(s) and skip the fruit and nuts. But I joined this group to make Dorie's recipes and Dorie has fruit and nuts.
Sour cherries seemed a natural choice (and I love them), but I've used cherries in two of Dorie's cookie recipes recently (and also in other cookies and home made granola), so I ruled cherries out.
A strong contender was golden raisins, which I figured I would chop so that they would be present but would not scream "raisin." I was also intrigued by crystallized ginger, which may not be a fruit, but is sold in the dried fruit section!
Dorie loves to put salty nuts in her sweets, and I'm with her in theory. But in practice I've not liked it as well. I used peanuts in the Granola Grabbers and didn't really care for the nuts. I used cashews for half of the Quintuple Chocolate Brownies, but preferred the half I made without them. I settled on salted macadamia nuts, which I hoped would be subtle, soft, and salty enough to add interest to the cookies and not bicker with all that fabulous chocolate.
But still I wavered. Bah, try it all. I baked four variations. All of the cookies got semisweet chocolate chunks stirred in. And then I separated the dough into four parts:
1. with milk chocolate stirred in, but no nuts or fruit. I studded half of the cookies with white chocolate before baking (but not this one!)
2. with milk chocolate and crystallized ginger. no nuts or white chocolate
3. with white chocolate, chopped golden raisins, salted macadamia nuts (this is the closest to Dorie's recipe)
4. with milk chocolate, chopped golden raisins, crystallized ginger, salted macadamia nuts
further notes:
- I added a bit more butter to make them more chewy and promote a bit of spreading
- I used a less of most of the stir-ins because I wanted to have a higher cookie-to-stuff ratio.
- the dough tasted like the inside of an undercooked brownie
- my cookies baked at 325 degrees for 11 minutes
- I made exactly 24 cookies (6 of each combination)
- the milk chocolate melted weirdly in the oven
The Verdict:
On baking day -
I had half of a #1 cookie ("just chocolate") while warm - it was fantastic! Lots of chocolate, all playing quite nicely. Had the other half after it was refrigerated - even better. A world class chocolate chunk cookie. Similar texture to a good chocolate chip cookie.
I ate a #4 cookie ("ginger, nuts, raisin") at room temp - it was chewy, chocolate-y, and the ginger was quite noticeable, but not unpleasantly so. The raisins added texture but not identifiable raisin-ness (I'm glad I chopped the raisins). Really a complex flavor combination. Almost out of control, but hanging onto unity.
My friend D had a #2 cookie ("chocolate and ginger") out of the fridge. He loved it. I asked if the ginger was too dominant. He said "No, but I love ginger." I had one also, and agreed.
All in all, it was a great International Chocolate Day!
Two days later -
I ate a #3 cookie ("white chocolate, golden raisin, macadamia nut). I'd stored the cookie in the fridge, but left it at room temp for several hours. It had gotten softer, and had a very cocoa-y flavor. It strongly resembled a brownie. The salted macadamia nuts were surprisingly GOOD in the cookie.
The rest of the cookies are safely in the freezer. I'll bring them to book group on Thursday and get their opinions. These folks have already tasted the World Peace cookies and the Whopper Drops.
Thanks to Claudia of Fool for Food for selecting this timely recipe! You can find the recipe on her post (click under the photo to read her post in English, unless you speak German!) or on page 70 of Baking From My Home to Yours. For more fabulous and creative renditions of the Chocolate Chunkers, check out the bakers on the TWD blogroll.
Endnotes:
a. These cookies were FAR better than last week's Whopper Drops, but not quite as good as Dorie's World Peace cookies (making those would be a fabulous way to celebrate International Chocolate Day!)
b. Consumer Guide provides a roundup of lots of different reviews of baking chocolate, which makes for very interesting reading. Of course I found this article after I'd already re-stocked the chocolate drawer...