Sunday, November 30, 2008

{TWD} Thanksgiving Twofer Pie goes Zero fer Two


Dorie Greenspan's Thanksgiving Twofer Pie went into Thursday's pie competition round against some proven champions and a new challenger, and despite turning in a solid performance, failed to score a win in either of the categories: Filling, or Crust.

This recipe combines the flavors of pumpkin pie with those of pecan pie, all in one rich, butter-crust-encased package. I've got to say right here that I love pumpkin pie, and I love it best when it's deep, dark, and heavily spiced. I'm not a fan of pumpkin chiffon pie or pumpkin cheesecake - I end up feeling cheated of that intense pumpkin jolt. On the pecan side of the aisle, I'm not as passionate, but I do have a pecan/maple pie that is really good, and feel no need to search out a better recipe (although the Chocolate Pecan Pie I made on Tuesday was also amazing). I was very interested in seeing how the Twofer pie would stack up against the Thanksgiving competition.

I was lucky to be joined in cooking by my oldest daughter, A.L.E., who flew in on Thanksgiving morning. We set right to work baking the Twofer.

A.L.E. eyed the new bottle of Myers Rum, purchased for the 2 tsp of dark rum in the recipe's ingredient list. "If we had any ginger ale, we could make Dark and Stormys."

"Hmm, I think there's some old flat ginger ale in the back of the downstairs fridge."


So, fortified with a delicious taste of the islands (1 shot of dark rum in a glass of ginger ale; technically this drink should be made with Gosling's Black Seal Rum and Jamaican Ginger Beer), we carried on with the recipe. Dorie's crust and both fillings came together pretty well. We made crusts at the same time for the two other pies that we were baking at the same time: Apple and spicy Pumpkin. We used the Cook's Illustrated recipe for these other crusts; scroll down to the end of this post for a comparison of the two pie crust recipes.

The dogs really do eat the crumbs when A.L.E. is cooking!
It got a little confusing following all the different recipes (while enjoying our cocktails), and A.L.E. spooned pumpkin out of the can and into the pecan filling (she was able to fish it out). This prompted her to dispense this piece of sage advice: "Don't cook wasted, man!" Which, I assure you, we were not doing. But it was a bit surreal to have the little girl who began cooking with me at age 2 standing on a stool at the counter, now mixing me a cocktail as she deftly whisked and processed ingredients for a complicated pie recipe.

Our biggest dilemma was which pan(s) to use for the pie. We finally settled on dividing the recipe into two small-ish pies, since the P&Q contained reports of trouble with overflowing pie crusts with 9" single pies.

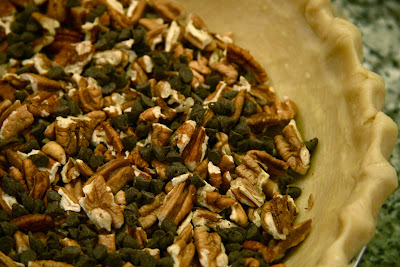
We chose a 7" foil pie pan and a 7.5" tart pan with deep sides, and aimed for a 1/3 - 2/3 split of the ingredients. It turned out that neither pie shell was completely filled. I probably should have stopped to do some volume calculations before I filled the pans, but I was too lazy.

I was surprised at how little of the pecan filling there was. Also, I didn't split the nuts very well, so I had a higher percentage of them in the shallow pan.

Based on the experiences of those posting on the P&Q, we did not blind-bake the crust. I adjusted the temperatures a bit and baked the pies at 425 for around 10 min, and then 325 until done - fairly quick for the small shallow pie, and somewhat under 45 minutes for the deep tart.

There was just too much going on - apple pie, pumpkin pie, cocktail hour - for me to make specific notes of the exact baking times. I'm just lucky I didn't forget them in the oven and burn them to a crisp.

the verdict:

Thanksgiving day tasting --

- We ate the shallow pie on Thanksgiving. It was OK. Pretty good, but didn't knock either one of us over. The filling was kind of bland, we thought.

- The pecans were distressingly soft for some reason. I'm blaming the nuts not the pie recipe, however. They were very fresh, and I attribute the softness to that (?). I did toast them in the oven before starting the recipe, and they seemed nice and crunchy.

- It is just as much work as making the two separate pies, and personally, I prefer my favorite pumpkin recipe and my favorite pecan recipe to this recipe.

- A.L.E. observed: "It wasn't worth the heartache."

second day tasting --

- We cut into the deeper tart. We thought the flavors were better the second day, and we preferred the deep pie to the shallow one.

- A.L.E.'s comment: "Now I understand the pie."

- I still prefer my pumpkin pie's spicy deliciousness, but I can see how Dorie's pie could be appealing to those less obsessed with pumpkin. So, while this was a good recipe, I preferred the fillings of the other three pies I baked for Thanksgiving, and the crust from the Cook's Illustrated recipe (comparison below, and see my Chocolate Pecan Pie post).


crust comparisons --

I grew up eating pie with an all-shortening crust, and I'm used to its sturdy flakiness. At this point, however, shortening gives me the willies. Actually, I have issues with using any large blocks of fat in cooking. But working with butter is (slightly) more appealing to me than shortening.

Here's where I admit that I've been using the Pillsbury All Ready pie crusts for years. It is easy. I haven't owned a food processor until this summer, and making pie crust has always seemed like a big hassle to me. And I don't mind the taste of the ready-made, especially given that my main interest in eating pie is what's inside the crust. In fact, most of the time I'd be perfectly happy with ramekins of cooked pie filling. And yes, when I pull the magic dough out of the box I'm not forced to confront the crazy amount of fat that pie crust entails.

Owning a food processor has made a huge difference for me, especially in the pie crust department. My first homemade crust in a long time was for the Summer Fruit Gallette - my first official TWD week, back in July. I loved that crust in that recipe. I made minis and froze some of them unbaked. We just finished the last one about a month ago, and it was delicious.

I knew that I wanted to make the Twofer Pie with Dorie's crust recipe, but I also was intrigued by the premise of the vodka-added Cook's Illustrated crust. Thanksgiving provided a perfect set up for a side by side comparison!

- Both recipes employ mostly butter + some shortening. Dorie's has a higher percentage of butter and just 1/3 c of shortening for 2 crusts, and Cook's Illustrated has 1/2 c. shortening for a double crust.

- Cook's Illustrated uses an extra bowl for hand stirring the ice water and vodka into the dough.

- When it came time for rolling, the Cook's Illustrated handled like a dream; it makes a silky smooth dough.

- Neither recipe holds an edge like an all-shortening pie crust - or the Pillsbury pie crust.

- Dorie's is softer, more delicate. A.L.E.'s reaction: "too buttery." It's amazing to see how much difference an additional few tablespoons of butter and a few fewer of shortening can make. We thought the buttery flavor distracted from the pie filling.

- The Cook's Illustrated crust was flakier, crisper, and more neutral in flavor. It didn't compete with the filling, but played its supporting role beautifully.

- Because of superior handling, and perfect blend of taste and flakiness, the Cook's Illustrated crust will become my new standard crust. I think that from now on I'll continue making pie crust from scratch (but there is a box of Pillsbury's in the freezer for crust emergencies!)

Vibi of La Casserole Carrée selected this week's recipe, and you can see her stunning Twofer Tart pictured on her post, and find the recipe - in French and English, no less - there too. Or you can pick up your very own copy of Dorie Greenspan's book Baking From My Home to Yours, where this recipe is on page 321. For further baking fun, check out the Tuesdays With Dorie blogroll and click on the blogs of 359 other bakers to see how they fared with the pie.

{Note: I'm celebrating my first 100 blog posts with a cookbook giveaway - to enter, go here and leave a comment before December 3}

Saturday, November 29, 2008

{T-giving} Sweet Potatoes with Brown Butter, Sage and Parmesan, (plus a great way to precook sweet potatoes)

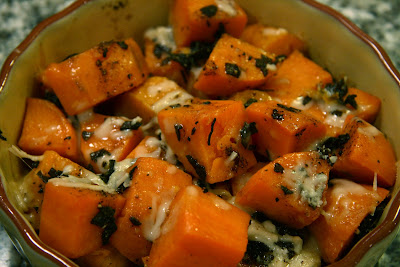
Pardon the terrible photo; in person this really looked good and tasted even better
To me, Thanksgiving dinner simply would not be complete without some type of sweet potatoes. Over the years, I've enjoyed them in many different ways, but all have been on the sweet side of the street: my sister in law uses a recipe that's lightly maple scented, my mother's involves layers of sweet potatoes with orange juice and dried apricots, while my mother-in-law's version is filled with butter, sugar and pecans.

This year I was up for trying something new. I paged through cookbooks and checked my online recipe bookmarks, and narrowed it down to two recipes:

1. Williams Sonoma
's Sweet Potatoes with Brown Butter and Parmesan Cheese (recipe at end of this post) from The Best of the Kitchen Library, Holiday Favorites volume.

or

2. Saveur
's adorable Sweet Potato Casserole (with marshmallow topping on one side and the other half with nuts and brown sugar)

I left the final decision up to A.L.E. She was heavily swayed by the parmesan cheese, and chose the Williams Sonoma recipe.

cook's notes:

- I made a quarter-recipe for the three of us.

- the Cook's Illustrated Fall Entertaining 2008 magazine has an article about making mashed sweet potatoes. In their usual obsessive way, they figured out exactly the best way to cook sweet potatoes so they don't get soggy, or lose their flavor. It turns out braising them on the stovetop is the best method. I decided try braising instead of the steaming that the recipe has for the first step. I put the tiniest bit of butter and water in the very bottom of the pan. The sweet potatoes took it from there, mostly cooking themselves without losing too much juice. This step added another dirty pan, but I served the potatoes in their baking dish, so I saved one there. (But, really, Thanksgiving is totally about using every pot, pan, and dish in the kitchen, isn't it? And covering every available inch of counter space with something.)

- I didn't read carefully enough, and put all the cheese in before popping the baking dish in the oven. It did kind of clump together, so it would have been better to grate some on top after taking it out of the oven.

the verdict:

This recipe is a keeper! I know the picture up top is not great, but take my word for it; these potatoes are really, really, really good. The brown butter and sage are a perfect complement to the flavor of the potatoes. I liked the Cook's Illustrated method of cooking the potatoes and will do that every time I need to pre-cook sweet potatoes.

It's a great recipe for Thanksgiving but unlike the marshmallow topped casserole, this one could be an appropriate side dish for a normal dinner.

Sweet Potatoes with Brown Butter and Parmesan Cheese

4 lb tan-skinned sweet potatoes, peeled and cut into 1-inch cubes
1/2 cup plus 2 tablespoons unsalted butter
1/4 cup chopped fresh sage or 1 1/2 tablespoons dried sage
salt and freshly ground pepper
1 1/4 cups freshly grated Parmesan cheese
fresh sage sprigs, optional

Place potatoes on a steamer rack and set over a steamer pan of boiling water. Do not allow the rack to touch the water. Cover and steam until just tender when pierced with a fork, about 15 minutes. Remove from the steamer and let cool. (I braised the potato cubes on the stovetop in a little butter + water)

Preheat an oven to 400 F. Butter a 13-by-9-by-2-inch baking dish. Transfer the sweet potatoes to the dish.

In a heavy frying pan over medium-low heat, melt the butter and cook, swirling the pan occasionally, until the butter is golden brown, about 5 minutes. Add the chopped or dried sage and salt and pepper to taste. Continue to cook until the butter is a deep golden brown, about 2 minutes longer. Pour the browned butter over the sweet potatoes. Sprinkle evenly with 3/4 cup of the cheese. Stir to coat. Taste and add more salt, and pepper, if desired. Cover the dish with aluminum foil. (Oops, I put all the cheese in the pan)

Bake the sweet potatoes until heated through, about 20 minutes. Transfer to a warmed serving platter and sprinkle evenly with the remaining 1/2 cup Parmesan. Garnish with sage sprigs, if desired, and serve at once.

Serves 8-10

Friday, November 28, 2008

{T-giving} Chocolate Pecan Pie and a Fabulous Pie Crust!

Although I had planned our Thanksgiving pies: Dorie's Twofer pie and two of our all-time favorites: my mom's apple pie, and our dark and spicy pumpkin pie, I ended up with an unexpected opportunity to squeeze in another kind of pie. My sister-in-law became ill just before they were to host her side of the family for Thanksgiving. I offered to help with cooking and found out that what they really needed was pie.

My brother jokingly hinted for a chocolate pecan pie. He'd eaten one years ago, and really loved it. I did a bit of online research and found this recipe for Texas Chocolate and Pecan Pie - from the March, 2000 Bon Appetit.

cook's notes:

- I decided to try the Cook's Illustrated pie dough (I found it in the Fall Entertaining 2008 issue, but you can find the recipe online, eg., here). This crust has a secret ingredient: vodka. Apparently the alcohol keeps excess gluten from forming. The extra liquid makes the dough soft and pliable (it's a dream to roll). In the oven the alcohol evaporates and the pie is left with flaky crust.

- I substituted golden syrup for the light corn syrup. I do that pretty routinely. Golden syrup has a mellower flavor, and is not as sweet as corn syrup.

- My dark brown sugar supply was low, so I used 1/4 c. light brown sugar and 1/4 c. dark muscavado sugar

- Along with the butter, I melted 2 oz Valrhona semisweet (56%) and 2 oz Nestles semisweet chocolate chips.

- When I mixed up the filling, I snuck a little taste and thought it could use a bit more chocolate. To boost the chocolate quotient I sprinkled mini chips over the pecans before pouring in the liquid filling. Some of them floated to the top of the pie, which you can see in the photo above.

- I studded the top of the pie with a few tiny pecan halves.

- The pie baked 50 minutes (I think...)

- I saved enough of the dough and the filling to make 2 mini tartlets - I lined one tart crust with pecan pieces and one with chocolate chips. I placed tiny pecans on the tops. These baked for 30 minutes.

the verdict:

A.L.E. and I each had a tart as a Thanksgiving prelude, while we were cooking. This is a seriously delicious pie!!!

The last time I'd eaten a chocolate pecan pie I hadn't cared for it. I think the switch from light corn syrup to golden cane syrup was a good one, keeping it from being too sweet while adding a certain richness of flavor.

This may not replace my usual pecan pie, which is made with maple syrup, but it ranks right up there next to it.

And can I tell you how fabulous this pie crust recipe is? Wow, it was easy to put together, and easy to roll and handle. It is amazingly flaky, and very tender. All due to the vodka. I'll do a taste test with Dorie's crust when I post the Thanksgiving Twofer Pie!

[update: find the taste test at the end of the Twofer Pie post]

Thursday, November 27, 2008

{T-giving} Pumpkin Soup


Happy Thanksgiving, everyone! We are having an unusual holiday; since A.L.E. flew in today, and our relatives were otherwise occupied, we only had the three of us for dinner. We decided to split the cooking and eating over two days, and have our Thanksgiving first course and desserts today (with mac n cheese from the freezer), and the turkey and trimmings main course on Friday (with leftover pies, of course!)

Here's a fantastic pumpkin soup that we first tried last year. It made such a big hit with all of us, we just had to repeat it. You can make this recipe in a snap, and it's low fat but so rich and creamy tasting that you'd never know!

Pumpkin Soup
This is my adaptation of a recipe from Epicurious.com, but I can't find the original cite.

2 Tablespoon unsalted butter or less if using a nonstick pan
1 cup chopped onion (I used pre-chopped)
1 clove garlic, minced
1 ¾ cups chicken broth (14oz can), or homemade (I used homemade)
1 16oz can pureed pumpkin (I used homemade)
¾ teaspoon brown sugar (packed)
1 teaspoon chopped fresh thyme or ¼ teaspoon dried thyme (I used fresh)
1 teaspoon chopped fresh rosemary or ¼ teaspoon dried rosemary (I used fresh)
½ teaspoon ground cumin
¼ teaspoon salt
dash white pepper
dash red/cayenne pepper
dash nutmeg
1 cup evaporated skim milk or combined with 2% milk
1 cup chopped pecans, toasted

1. In a large saucepan, melt butter. Saute onion and garlic over medium heat for 7-8 minutes until lightly browned.

2. Add broth, pumpkin, and seasonings. Bring to a simmer. Reduce heat and cook for 10 minutes, stirring frequently.

3. Remove from heat. Stir in milk.

4. In a blender or food processor, combine soup mixture and pecans in batches at low speed for 1 minute. (I pureed in two batches in blender)

5. Return to pan and heat, stirring.

Today, I am overwhelmed with thanks that I have food to eat, a roof over my head, family and friends to share it with. I'm also grateful that I can enjoy cooking as an avocation, with such a bounty of resources and fellow cooks with whom to compare notes.

{Note: I'm celebrating my first 100 blog posts with a cookbook giveaway - to enter, go here and leave a comment before December 3}

Wednesday, November 26, 2008

Thanksgiving preview

Some of the goodies in this week's vegetable box - just in time for Thanksgiving cooking!

sweet potatoes, green beans, broccoli, scallions, 3 kinds of carrots, white potatoes

fresh pecans (and two disks of chilled pie dough)

{Note: I'm celebrating my first 100 blog posts with a cookbook giveaway - to enter, go here and leave a comment before December 3}

{Simple Soup Supper} Busy Day Chicken Tortellini Soup


This hardly qualifies as a real recipe, but busy times call for dinners with shortcuts! The original inspiration for this soup was on a label of Swanson's chicken broth that I came across years ago, and have significantly embellished. Depending on whether I use homemade stock and chicken (as opposed to canned or cubes of stock, and a rotisserie chicken) and freshly chopped veggies and herbs, this can be a little or a lot better than a can of soup. In this busy week before Thanksgiving, a little simple soup really hit the spot, combined with some hot multigrain bread and a green salad.

Busy Day Chicken Tortellini Soup

1 T. olive oil

1 large carrot, sliced (about 3/4 cup)

1/3 cup celery, chopped

1/3 cup onion, chopped

1 tsp. minced garlic

1/4 tsp red pepper flakes

2 qt. chicken stock, homemade or purchased

1 cup (weight: 4 oz.) dried tortellini, such as Barilla (or 1 package frozen tortellini)

1 1/2 cups shredded cooked chicken

1-2 tsp. chopped fresh herbs, such as Italian parsley, oregano, or thyme (or 1/2 tsp dried)

1. Heat olive oil in large saucepan, and saute carrot, onion, and celery for 3 minutes.

2. Add garlic and red pepper flakes, and cook an additional minute.

3. Add chicken stock and bring to a boil over medium-high heat.

4. Reduce heat to medium, add tortellini, and simmer for 10-15 minutes until tortellini are cooked through and vegetables are tender. (If using frozen tortellini, follow the cooking time on the package, and let the veggies simmer in the stock for a few minutes before adding the tortellini.)

5. Stir in fresh herbs and chicken. Bring soup to a boil and serve.


{Note: I'm celebrating my first 100 blog posts with a cookbook giveaway - to enter, go here and leave a comment before December 3}

Tuesday, November 25, 2008

Rye Apple Cake


During my very busy spell earlier this month, I was alternately sustained and tormented by thoughts of one recipe on my List: Rye Apple Cake. On one of my forays through the foodiesphere I found Dan Lepard, a British chef who writes a weekly bread and baking column for The Guardian. He runs a Bakers Forum where he takes time to answer questions about the various recipes that he's featured in his columns, and lots of other bread and baking questions. (One charming feature about the forums: in order to post, you must be a registered user, and to do that you must fill out an application. You then receive an email with an essay question about yourself and the baking that you do. I wrote about my baking and my blog, and Dan himself checked it all out and replied via email with a personal welcome and a few kind words about my blog.)

Several of Dan's recipes are quite appealing, but the Rye Apple Cake entered my head and would not leave. I was too busy to bake anything but the TWD recipes for a couple of weeks, but during that time I picked up rye flour and managed to find muscovado sugar (Yay, Fresh Market!) - I already had Lyle's Golden Syrup and demerara sugar. I was totally willing to sacrifice one of the precious Macoun apples from my stash.

cook's notes:

- I grind a bunch of almonds at once and keep a container of ground almond in the freezer. It saves a step when cooking time rolls around (and also saves having to wash the food processor!)

- You can substitute 100 g. brown sugar + 4 T. molasses for the muscovado sugar.

- Use a strong, tart apple, or the flavor will be lost. Granny Smith would be a good, readily available choice. Mackintosh would also work. I used Macoun, which was nice.


- My egg turned out to have a double yolk, which I've never seen before (it's not unheard of, just a bit unusual). These were eggs from my farm co-op order. Since it wasn't a noticeably large egg to begin with (double-yolk eggs often are larger and pointier) I decided to use both yolks.

- The batter tasted like a not-too-sweet caramel apple.

- The recipe called for a 2 pound loaf pan. It didn't rise very much, and so turned out a bit flat. I might experiment with different pans next time.

the verdict:

This cake is delicious! It has a soft texture and lush moistness that seems improbable in a cake made with rye flour. I veer between thinking it's perfect as is (my husband's position) and thinking it could use just a pinch of apple-pie-type spices.

Next time, I might bake it in a smaller pan, maybe a 1 pound pan + a mini, to see how it would be with a bit more height. I could also try cutting squares rather than slices. Well, any way you cut it, it's a great cake.

I love that this recipe has rye flour and ground almonds for the dry ingredients. And I'll be trying more of Dan's recipes!

Here are some other apple cakes on my radar:
Unfussy Apple Cake - 101 Cookbooks blog
My Mom's Apple Cake - the Food Librarian blog
mom's apple cake - Smitten Kitchen blog

In case you stopped by looking for this week's TWD post, we've been given an extension! The recipe this week is the Thanksgiving Twofer Pie, and we are allowed to post anytime before Sunday, November 30. The P&Q is filled with tales of triumph and woe... I'm planning to bake this with my daughter A.L.E. for Thanksgiving, so check this space over the weekend to see how it turns out!
[edit: Vibi of La Casserole Carrée selected this week's recipe, and you can see her stunning Twofer Tart pictured on her post, and find the recipe - in French and English, no less - there too.] You can also find the recipe and a pretty nice picture of the pie here.

{Note: I'm celebrating my first 100 blog posts with a cookbook giveaway - to enter, go here and leave a comment before December 3}

Monday, November 24, 2008

{Cooking Light Night} Roast Potatoes with North Indian Spices

I have no idea what led me to the recipe for these potatoes, but it made its way to the top of The List, and I'm glad it did! I'm a big fan of potatoes, especially roast potatoes, which I usually toss with olive oil, salt, pepper, and some fresh herbs. I've never seen this combination of ingredients (jalapeno, mustard seed, fresh ginger, garlic, turmeric, dried hot peppers, mint, cilantro, lime juice), and was very curious to see how all those flavors melded.

cook's notes:

- This recipe is very fast-paced, so I'd recommend that you have everything chopped, measured, ready, and in prep bowls.

- I didn't have black mustard seeds, so used the yellow variety. I found that the seeds popped right on time, but that they seemed to continue cooking a bit too much. I'd add the next ingredients after about 30 seconds, instead of waiting for the seeds to pop.

about to pop!

- I used a spatter guard so that the popping seeds wouldn't jump out of the pan.

- Turmeric is highly STAIN-producing. We've actually learned this in various interesting ways over the years, but I thought my blue silicone baking dish would be impervious. I was wrong, and now I have a blue + green baking dish. Use glass or metal bowls and pans for this recipe (unless you have a yellow baking dish already).

- I only had a tiny bit of fresh mint, so I cut the herb/lime part way back. It was great on the potatoes, so next time I'd make sure to have enough.

ready for the oven
the verdict:

- these potatoes are unusual and delicious. You can increase the spice level by adding cayenne pepper powder, or more of the jalapeno.

- I served the potatoes with some lamb chops from the freezer (left over from a catered party), and a simple green salad. The potatoes shone in their starring role.

As always, thanks to Clara (CB) of I Heart Food4Thought for giving permission to use her "Cooking Light Night" logo. I've really enjoyed exploring the Cooking Light archives!

{Note: I'm celebrating my first 100 blog posts with a cookbook giveaway - to enter, go here and leave a comment before December 3}

Sunday, November 23, 2008

Fun with Awards

I've received three blog awards this month - it's always such a compliment to find a bloggie in the comment box! I'll pass them along to some great blogs that I've not yet honored.

Lisa of Magic Sprinkles gave me the I'm a Chocoholic award, and my question is: how did she know? I enjoy Lisa's blog because she is always cooking up delicious and fun food, and she writes about her adventures with humor and grace. Thanks, Lisa!

I'd like to pass this award to:
Cathy of The Tortefeasor (my only repeat recipient)
Maria of Two Peas and Their Pod
Amanda of Amanda's Cooking

I received the Kreativ Blogger Award from Peggy of Pantry Revisited. I love to read Peggy's blog because she's always up to something fun, like dressing as Little Red Riding Hood for Halloween, or baking in the midst of a total kitchen overhaul. This award comes with a meme- 7 categories of questions that require 7 answers each. You can find the meme at Peggy's post, but I must confess: I'm not much of a meme person, so I'm going to skip it!

Part of the meme is to name 7 recipient blogs. But I'm just going to I'll bestow this award to a few other blogs, and let each of them decide whether to play along or not:
Jamie of My Baking Addiction
Steph of Obsessed With Baking
Amanda of Beckett Bakes It

The Butterfly Award comes from none other than The Tortefeasor herself! Cathy has now joined three blog cooking events, so we will all be treated to three times the fun as she posts her results. Never a dull moment chez Tortefeasor!

This award has some rules also*, but since I'm in a rebellious mood, I'm passing this one on to just these special blogs:
Peggy of Pantry Revisited
Natalia of Gatti Fili e Farina
MacDuff of Lonely Sidecar
Caitlin of Engineer Baker

*from Cathy's site: "The rules of this award are: 1. Pick ten people to pass this onto if you choose (please note the emphasis here on the "if you choose" part. I am trying to honor your blog, not give you more work! If you don't want to pass it on, great! If you just want to pass it on to one or two other blogs, terrific! I won't tell the Butterfly Award police, I promise.) 2. Contact them and let them know you have chosen them for this award. 3. Also, link back to the person who gave you the award."

{Note: I'm celebrating my first 100 blog posts with a cookbook giveaway - to enter, go here and leave a comment before December 3}

Komatsuna Greens and Heirloom Tomatoes

Our farm box folks have been offering a great selection of greens. I ordered 2 bunches of a green I've never heard of: komatsuna, or "Japanese spinach." There aren't a whole lot of recipes out there specifically for komatsuna, so I started with a regular salad.


I had a bunch of assorted heirloom tomatoes on the counter, so I whipped up the simple Mixed Tomato Salad found in Everyday Food's Great Food Fast cookbook:

2 pounds mixed tomatoes, such as red or yellow beefsteak, cherry, grape, and pear - I used 1 pound
3 T. red-wine vinegar
3 T. extra-virgin olive oil
Coarse salt and fresh ground pepper
1 bunch arugula (6 - 8 oz) washed well and dried - I used 8+ oz of mixed arugula and komatsuna

1. Core the beefsteak tomatoes; cut each into 8 wedges. Halve the grape and cherry tomatoes; leave the pear tomatoes whole.

2. Make the dressing: In a small bowl, whisk together the vinegar and oil; season with salt and pepper. In a small bowl, whisk together

verdict

This salad was close to perfect. With just a 1:1 ratio of vinegar:oil, and some good red wine vinegar, the bright dressing highlighted but did not overwhelm the fantastic freshness of the varied tomato flavors. The komatsuna had a very mild, clean taste - I will order this green again, and make this salad again. Honestly, it doesn't get any easier - or tastier - than this. [edit: I've made this salad as written, with just arugula, and it's really great. I've also used this dressing with other salads, and enjoyed it. This time I just threw the komatsuna in there because I had it!]

The next day I sauteed some komatsuna leaves in olive oil with sliced garlic and pine nuts, stirred in a bit of leftover tomato sauce and spooned it all over pasta. It was delicious.


{Note: I'm celebrating my first 100 blog posts with a cookbook giveaway - to enter, go here and leave a comment before December 3}

Friday, November 21, 2008

100 Posts, Paul Newman, and a Giveaway!

{Update, December 3, 2008: by the decision of the random number generator, the winner of the cookbook giveaway is Katrina of the Baking and Boys blog. Katrina, I'll get with you about the mailing details.}

I began this blog 4 months ago so that I could participate in the online baking group Tuesdays With Dorie. All I knew is that I would be baking the assigned recipes at least 2 weeks out of every 4 and would blog the results (those are the minimum TWD requirements). It turns out that I've done that, and more (I've not missed a week of TWD, even with a busy travel schedule). Give me a camera and a keyboard - and a cooking blog - and I'll average 25 posts/month, apparently. So here we are with my 100th post!

I'm celebrating with a giveaway:


My bookshelves are groaning under the weight of my cookbook collection, but there are a special few that I reach for time after time. One favorite is the Hay Day Cookbook, a now-out-of-print collection of fabulous recipes that feature fresh, quality ingredients, arranged by seasonal availability. For example the Fall section has some of the tastiest apple dishes you could ever imagine, and Summer features tomatoes, corn, and fantastic cold salads. Additionally, there are boatloads of how-to's, tips, articles, charts, and suggested menus.

The Hay Day Country Farm Market was a great specialty food shop/glorified produce stand in Westport, Connecticut. Paul Newman, one of Westport's more famous residents, was known to be a regular at Hay Day. Another resident, Martha Stewart, no doubt stopped by periodically for some produce (or maybe something from the prepared-food case?) Of course I never saw either of these luminaries (nor the lovely Joanne Woodward) on my occasional trips to the market, but the food pretty much made up for any disappointment!

My parents lived in a nearby town, and my dad stumbled on a used copy of the market's first cookbook. It quickly became a family favorite, and he had to track down a copy for me. (He had a used book business, but it was a lot harder finding specific books in the days before internet listings.)

Now that my girls have kitchens of their own, I thought I'd buy them copies of this out-of-print cookbook for Christmas (shh, don't tell them!) One for each girl. Two copies total. But counting to two seems to have been more of a challenge than I was capable of handling, and I've ended up with three copies (!) I can't think of a more deserving recipient for that third copy* than....you!

If you'd like your very own Hay Day Cookbook, just leave me a comment on this post by noon Eastern Standard Time on December 3, 2008. Be sure to include some way that I can contact you (your blog name/url or you could subscribe to follow-up comments - I will announce the winner in the comments as well as in the main post).
I will generate a numbered list of unique commenters. But here's a bonus: if you include a sentence or two in your comment about any one, or combination of, (a) Westport, Connecticut, (b) Paul Newman/ Joanne Woodward, or (c) Martha Stewart, I will enter you a second time. On December 1, I'll use a random number generator to choose the winner. I'll be happy to mail the book anywhere in the world, but it may be by slow boat!

I was in junior high school when Butch Cassidy and the Sundance Kid was released. Could there have been a better time to be introduced to Paul Newman? (Or Robert Redford, for that matter?) Sure, there was a minor love story subplot (the bicycle scene with the accompanying "Raindrops Are Falling on My Head" remains classic 1969 film footage), but this movie will always be, for me, the perfect Buddy Movie. With the perfect buddies.

Years later, when my girls were preteens, we were talking about movies and I mentioned Paul Newman. They scratched their heads for a minute, and then one of them said, "Oh, you mean the salad dressing guy?"

And really, Newman's Own, and the money it generated for charity, may be as great a legacy of this great man as his stirling acting credentials. My parents were at a party about 8 or 10 years ago, and ran into Paul Newman and Joanne Woodward. Paul asked my dad what his job was, and they chatted about that for a few minutes. Then my father asked Paul, facetiously, what was his line of work. Paul answered, completely deadpan, "I make salad dressing."


* The book is used, but a very nice copy. Here are the bookish details (as described by the bookseller from whom I purchased this copy): "Very Good Hardcover book with very Good Dust Jacket. Binding tight and straight. Pages clean and unmarked."

Thursday, November 20, 2008

Of Pumpkins and Seeds

I finally cooked up the sugar pumpkins that had been hanging around the house. They came in very handy as Halloween table decorations, etc., but I was eager to turn them into puree that I can use for further pumpkin baking adventures (pumpkin pie and pumpkin soup for Thanksgiving, specifically). I did a test run of two ways of cooking pumpkin: the oven roasting method and the microwaving method, and I preferred the microwave method. But it could also have been the particular pumpkins.

Microwaving pumpkin:

1. Cut the pumpkin in pieces, place in microwave-proof bowl with 1/2 cup water. Cover and microwave for 10 minutes.

2. Cool and then scoop pumpkin meat from the peel. Puree the pumpkin in a blender.

3. If your puree seems too watery you can put it in a fine mesh strainer (lined with cheesecloth if necessary) and let some of the water drain out until it reaches the desired consistency.

4. At this point you can freeze the puree until you're ready to cook with it.

Roast Seeds
I've tried to roast pumpkin seeds in the past, but have never been too impressed with my results. This Real Simple recipe for Spiced Pumpkin Seeds looked, well, real simple, so I thought I'd give it a go. The most appealing part: no need to rinse the seeds!

cook's notes:

- This was super quick to throw together. The most time consuming thing was separating the seeds from the pulp (which wasn't bad).

- I made 3/4 recipe because I had a medium and a small sugar pumpkin.

- The seeds cooked at 275 degrees on "convect" for 40 minutes. I took the pan out and shook the seeds every 10-15 minutes.

the verdict:

These make a great snack, and were also good sprinkled atop a salad. I'll make them again! They were a "flavorful spicy" and not a "hot spicy." In fact, since I like a little heat with my spice, I might substitute cayenne pepper for a quarter of the cumin next time.

Wednesday, November 19, 2008

Ultimate Enchiladas in Salsa Verde

This was one of those at-the-gym-watching-Food-Network finds (in fact the same gym session as Guy Fieri's bacon+pasta show!) Tyler Florence cooked Ultimate Chicken Enhiladas, and he had me at the roasted tomatillos. I couldn't wait to try making these myself, and am very glad that I did.

cook's notes:

- If your tomatillas are of different sizes, cut the larger ones or roast them for a longer time to make sure that they are all cooked through.

- Roast the garlic unpeeled. You can easily slip it out of the peel after it's cooked.

- I used hot finger peppers instead of jalapenos. We like the extra heat.

- When making the salsa verde, add the lime and cilantro last, adjusting to taste. I used half the cilantro, and all of the lime. For a while it seemed like it might have been too much lime, but by the time I mixed everything else together it was perfectly balanced.

- If you use a purchased rotisserie chicken, check that it's 3 pounds. The one that I bought was only 1.5 pounds, so I had to make a half recipe. The 1.5 pound chicken yielded 3/4 pound of shredded meat. I often use leftover cooked chicken that I try to keep in my freezer. A full recipe would require 1.5 pounds of shredded chicken.

- Use a whisk when adding the chicken stock to the pan for the veloute to keep lumps from forming (or to break up lumps that have already formed). It took about 5 minutes of simmering for my sauce to thicken.

- I added water to the salsa when it came time to dip the tortillas. There are lots of things that the salsa is needed for, and I wanted to have enough.

- I used half white tortillas and half whole wheat tortillas. We preferred the whole wheat.

- I used a bag of pre-shredded Mexican blend cheese.

- An 8x8" pyrex baking dish was a good size for half a recipe.

the verdict

This really was the ultimate chicken enchilada! It was a bit of work, but the flavors had an amazing complexity from the different steps. Well worth the effort.

My husband gave this a 10 out of 10. I can't remember a better Mexican dish that I've put on the table.

for next time/ time saving tips

To save time, I plan to make a large batch of the salsa verde and freeze it. Doubling the salsa verde recipe would be easy, as there's very little chopping. But it would have to be pureed in 2 batches in the food processor, I think.

Using pre-shredded chicken, in addition to the pre-shredded cheese would also save time.

Tuesday, November 18, 2008

{TWD} Cardamom-Scented Arborio Rice Pudding


Spoon foods are big around our house: cereals, soups, and especially puddings. Making cooked puddings, however, has never worked out very satisfactorily for me. Water baths and I are not on particularly good terms, and that is a very common step to many pudding recipes.

So one day about 10 years ago when I spotted some packaged pudding in the dairy case sporting the claim that it was "better than homemade" I didn't hesitate to pick some up. What did I have to lose? It wasn't hard to better my homemade. Anyway, this stuff, Kozy Shack pudding, turned out to be really delicious, far better than anything I'd ever made, and water bath-free. (As an aside, Kozy Shack has lots of great flavors; the tapioca is especially good.) At this point Kozy Shack is the standard by which pudding is judged around here; some might ask "Is it as good as homemade?" but we ask, "Is it as good as Kozy Shack?"

When Isabelle of Les gourmandises d’Isa picked Arborio Rice Pudding, White, Black (Or Both) for this week's TWD recipe, I was game. Since joining the TWD group, I've tackled pie crust, caramel, creme brulee, and even yeast. The best news of all: this is a stovetop recipe, no water baths necessary.

Wikipedia provides this fascinating view of the long history and near-universality of rice pudding:

Rice puddings are found in nearly every area of the world. Recipes can greatly vary even within a single country. The dessert can be boiled or baked. Different types of pudding vary depending on preparation methods and the ingredients selected. The following ingredients are regularly found in rice puddings.

  • rice; long or short grain white rice, brown rice, black rice, basmati, or jasmine rice
  • milk; (whole milk, coconut milk, cream or evaporated)
  • spices; (nutmeg, cinnamon, ginger etc.),
  • flavorings; (vanilla, orange, lemon, pistachio, rose water etc.),
  • sweetener (sugar, brown sugar, noney, sweetened condensed milk, fruit or syrups)
  • eggs

Rice was first cultivated in Asia. Over thousands of years, various pudding recipes have developed in the Eastern Asia. Some include fruit and honey, while others are far simpler consisting of only rice, water and sugar.

...

In Europe, rice pudding with goat's milk was first used by the Romans for medicinal purposes. For this reason, the first written records of rice pudding occur in medical texts. Medieval European sweet boiled rice pudding often was made with almond or cow's milk. Rice pudding appears in 1542 in the then Danish town of Malmo. However, rice was an imported luxury item reserved for the rich. Baked rice puddings featuring elaborate spices and other ingredients appeared in the 17th century. In the 18th century, rice pudding began to replace rye porridge and barley porridge at festivities in Scandinavia. Over centuries, the European recipe has been simplified, resulting in the modern dish often criticized for its blandness.

Although lots of folks might think it bland, I find a simple vanilla rice pudding to be appealing and comforting, in a way that only a cold pudding can be!

cook's notes

-This was another week where reading the P&Q section was an enormous help. For one thing, Dorie herself wrote in (from somewhere in Southeast Asia, no less) to correct a typo in the book's cooking time: the pudding should cook for 55, not 30, minutes.

- Despite this correction, I was a bit nervous about the prospect of milk soup, so I rounded the 1/4 cup of rice (but it was still less than 1/3 cup. I also used a bit less milk - just under 3 cups. I kept the same amount of sugar as the recipe.

- Although the book gives a chocolate option as well as the classic vanilla flavor, I knew I wanted to keep it plain and simple. I figured I’d just add a tiny bit of my new favorite spice: cardamom. Along with a hint of citrus. So while the milk was coming to a boil, I added three green cardamom pods and ½ tsp of lime zest. Before I added the rice, I skimmed out the pods and the zest (which conveniently float). The milk smelled out of this world.

- The pudding thickened slowly. I tried to keep it “bubbling” - not boiling too hard, and not simmering too gently. It looked great at 55 minutes, but by 58 minutes (when I took it off the heat) it was a bit too thick.

- Once the pudding was cooked, I divided out 1/8 and stirred in some chopped bittersweet chocolate – it was easy enough to give myself a taste of Dorie’s “black” variation. {edit: I put 3/4 tsp of vanilla in the rest of the pudding}

- The pudding really cooks down, and I spooned it into three small bowls to refrigerate.

the verdict

The first thing my husband said when he tasted his pudding was, "Is this hard to make?" Already angling for another batch! And then he uttered the fateful words: “It’s better than Cozy Shack.”

I agree that it has fantastic flavor, and the rice was a perfect balance between firm and soft. I wouldn’t mind experimenting with a few other (subtle) flavorings, but my husband loves it exactly this way. I will cook it just a tad shorter next time so that it will be creamier.

Homemade that tastes better than Cozy Shack! Who knew?

You can find the recipe for this delightful confection on pages 412-413 of of Dorie Greenspan's book Baking From My Home to Yours, or in Isa's post (recipe in French and in English!) You can also hop over to the Tuesdays With Dorie blogroll and click on the blogs of 359 other bakers to see how they cooked up the Arborio pudding.

Monday, November 17, 2008

Rum Raisin Frozen Yogurt

My husband, J, loves rum raisin ice cream. I wanted to see if I could create a lower fat yogurt version for him. I didn't find any recipes, so I experimented. This is essentially a riff on David Lebovitz's basic vanilla frozen yogurt (his recipe is on lots of food blogs, such as this one), using the raisins from his Rum Raisin Ice Cream (both from Lebovitz's book The Perfect Scoop).

cook's notes:

I substited 2% for most of the yogurt, and used sweetened condensed milk for most of the sugar (because I had it in the fridge). Here's my recipe:

Rum raisin frozen yogurt for J

2.5 cups 2% greek yogurt

.5 cup full fat greek yogurt

1 t vanilla

4 oz sweetened condensed milk

¼ - ½ c. sugar (I used golden bakers sugar, very fine)

2/3 cup raisins, golden and brown mixed

½ c rum

1 slice orange zest

1. In small saucepan, bring raisins, orange zest and rum to simmer for 2 min.

2. Remove from heat and cover for several hours.

3. Mix yogurt, vanilla, condensed milk and sugar; put in refrigerator for a least 1 hour to chill.

4. When ready to process in ice cream maker , drain raisins and set aside, reserving rum. Measure rum and add more rum, if necessary, to to make 3 T total. Add the rum to the yogurt mixture, and pour in to ice cream freezer.

5. Freeze according to your machine's directions. When the yogurt is nearly frozen, add the reserved raisins.

Eat right away (for soft-serve consistency) or firm in freezer for an hour or so to harden a bit.

verdict

We ate this pretty much straight from the ice cream machine. It was really creamy, with a great 'mouth feel' - would be even creamier with whole fat yogurt. We'd like more rummy flavor, so I will keep experimenting.

The rest of the yogurt got very hard (and maybe a little icy) in the freezer. Still tasty, but nowhere near the fabulous experience of the freshly-made stuff.