Thursday, July 31, 2008


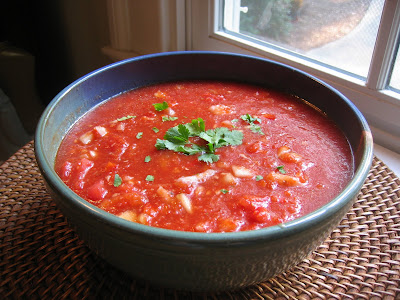
We're still on our holiday in Maine, and doing minimal cooking, but we made a lovely and healthy salad from a cookbook we found in the cottage. It's versatile enough to serve as a side dish to grilled chicken or fish, or as a main course, complemented with some greens and maybe a nice bread. I didn't think to photograph the lentils; the picture above is our view over dinner!

Lentil Salad with Walnuts and Scallions

from The New Best Recipe


1 cup lentils du Puy (green lentils) or regular brown lentils, rinsed and picked over

½ medium onion, halved

2 bay leaves

1 large sprig fresh thyme

salt

2 T sherry vinegar

2 T Dijon mustard

1/8 tsp ground black pepper

6 T extra-virgin olive oil

½ cup coarsely chopped walnuts, toasted

2 scallions, white and green parts, sliced thin

½ cup drained jarred roasted red peppers, diced (I roasted a pepper on the grill)

1. Bring the lentils, onion, bay leaves, thyme, ½ tsp salt, and 4 c. water to a boil in a med saucepan over medium-high heat. Reduce the heat and simmer until the lentils are tender but still hold their shape, 25-30 minutes (for regular brown lentils, cook 18-21 minutes).

2. Whisk the vinegar, mustard, ¼ tsp sale, the pepper, and oil together in a small bowl; set aside.

3. Drain the lentils through a fine-mesh strainer and discard the onion, bay leaves, and thyme. Transfer the lentils to a medium bowl. Toss the warm lentils with the vinaigrette and cool to room temperature, about 15 minutes. Stir in the walnuts, scallions, and roasted red peppers and serve immediately.

The Verdict:
This is a tasty summer dish, packed full of nutrition - fiber and protein. I've enjoyed it this week as a main course and a side dish. The toasted walnuts add a nice texture and a great flavor. If you think you'll be eating this more than one day, add the scallions and the walnuts as your serve the salad so they don't get soggy.

Tuesday, July 29, 2008

{TWD} Peach Raspberry Galette-ettes


For this week's recipe Michelle of Michelle in Colorado Springs chose Summer Fruit Galette, page 366 of Baking from my Home to Yours. You can find the recipe on Michelle's blog entry. Essentially a galette is a rustic pie, with the pastry rolled into one large circle and folded up over the filling.

My mother was an accomplished baker of pies. Every day when the four of us children took our afternoon naps, mom baked an apple pie. When we came downstairs from naptime we were greeted by warm pinwheels - the little cinnamon-butter rollups she made with the scraps of pie dough. We ate the pie for dessert after dinner. Yum! Mom's tender shortening-based crust paired perfectly with the just-sweet-enough apple filling.

Despite this wonderful heritage, I've not had great success with my pie crusts. I'm very much a novice baker. I'm glad to have the practice - and the great directions - that Dorie's book provides!

I had a bit of a dilemma about the galette. It's my first official week as a TWD member, so I did want to post. But we were headed out of town and we'd just finished the cobbler (and a bunch of other baking). Dorie says that galettes are great for freezing, so I decided to make mini galettes, sample one and freeze the others unbaked.

In hindsight I wish I'd divided the dough and rolled each part separately because I think I handled the dough a bit more than optimal. I rolled one big rectangle and cut three 6" circles (well, two 6" circles and one that I gently pieced from two big scraps - you can see that in the picture below, on the right). I chose to roll the dough between two sheets of parchment and it go a bit rough by the time the galette hit the oven. I did chill at every step, except for just before baking, when I forgot.


I lined the pastry with Stonewall Kitchen's peach amaretto jam and graham cracker crumbs ( 3 3/4 inch circles) before arranging sliced ripe Georgia peaches and red raspberries, then folded the pastry up around the fruit. I used demarara sugar for the pre-baking dusting.


I didn't think the custard step through very well, and probably baked the galettes a bit too long before adding the custard. I tried to give the custard enough oven time to "set", by which time the crust was a bit over-browned on the bottom. Also, I was only able to add a teaspoon of custard to the galette. And, I forgot to dust with powdered sugar at the very end.

The Verdict:
The little galettes were pretty time consuming. There were a lot of steps, and chilling/freezing at every turn. But also many of the techniques were new to me (for example, I've only had my food processor for a few weeks, and have never used it for pastry.) Despite the challenges, the little galette tasted fabulous. My husband savored every last crumb and pronounced: "This is one of the best things I've ever put in my mouth." I think my mother would be proud - I should have saved a bite for her! And I made cinnamon pinwheels with the dough scraps...

{Update: November 7, 2008:
We have been enjoying the galettes that I froze uncooked. I just popped them out of the freezer and right into the oven - it takes a few extra minutes to cook, but tastes wonderful. Having a ready-to-be-cooked galette in the freezer is like having money in the bank!}

Thursday, July 24, 2008

more of Delia's pasta


In the summer we love eating light dishes made from fresh ingredients (especially with all of the baking we've been doing). Delia's recipe-of-the-day yesterday was Lemon Pasta with Herbs and Cracked Pepper . I was intrigued by the combination of lemon with mint and basil - and arugula (I'm obsessed with arugula) - so when I was out running errands I picked up the things I needed to make it for dinner last evening. I topped the hot pasta with toasted pine nuts, and served it with crusty bread and a salad. Dessert was a fruit galette (more about that at a later date!)

The Verdict:
We loved this pasta. It was very refreshing. It looks like pesto but is lighter and has a bit of a bite from the herbs and the lemon. The flavors were balanced, but we could see that any one of the flavors could dominate if too much were added. The recipe is super-easy and can be eaten hot or cold, according to Delia.

Wednesday, July 23, 2008

I say "tomato"


After making gazpacho, we still had tons of very ripe tomatoes on our countertop. Time for Delia Smith's Classic Fresh Tomato Sauce! We have plenty of basil, so with just some onion and garlic we were all set.

This sauce is very easy, you just let the ingredients simmer on the stovetop for a couple of hours until "jamlike." I got mine almost as thick as Delia's, but then it thinned out a bit when the remaining uncooked tomatoes are added in at the end.


The Verdict:
This sauce is wonderful and will be my "go to" recipe when I have an excess of tomatoes. The flavor is very concentrated but still fresh. Much brighter than anything I've had from a jar, and I've had some delicious specialty jarred sauce.


Food in the freezer is like money in the bank!

Here's the recipe, with some of my notes:

Delia's Classic Fresh Tomato Sauce

ingredients:

2 lb 8 oz (1.15 kg) fresh, red, ripe tomatoes (around 12 plum tomatoes)
1 tablespoon olive oil
1 medium onion weighing about 4 oz (110 g), peeled and finely chopped
1 fat clove garlic, peeled and crushed
approximately 12 large leaves fresh basil
a little Parmesan (Parmigiano Reggiano), to serve
salt and freshly milled black pepper

directions:

1. First skin the tomatoes. To do this, pour boiling water over them and leave them for exactly 1 minute or, if the tomatoes are small, 15-30 seconds, before draining and slipping off their skins (protect your hands with a cloth if they are too hot).

2. Now reserve 3 of the tomatoes (around 10 oz) for later and roughly chop the rest.

3. Next heat the oil in a medium saucepan, then add the onion and garlic and let them gently cook for 5-6 minutes, until they are softened and pale gold in colour. Now add the chopped tomatoes with about a third of the basil, torn into pieces. Add some salt and freshly milled black pepper, then all you do is let the tomatoes simmer on a very low heat, without a lid, for approximately 1½ hours or until almost all the liquid has evaporated and the tomatoes are reduced to a thick, jam-like consistency, stirring now and then.

4. Roughly chop the reserved fresh tomatoes and stir them in, along with the rest of the torn basil leaves, and serve on pasta with a hint of Parmesan – not too much, though, because it will detract from the wonderful tomato flavour.

5. When serving this sauce, it is a good idea to give the pasta 1 minute less cooking time than you usually would, then return it to the saucepan after draining and give 1 more minute while you mix in the sauce.

Monday, July 21, 2008

{TWD} Cherry [Peach] Cobbler


I've joined an online group called Tuesdays with Dorie; these 200+ bakers/bloggers are cooking through Dorie Greenspan’s book Baking From My Home to Yours. My name won't appear on the blogroll until next week, but I began baking along with the group this week.

It was Amanda from Like Sprinkles on a Cupcake 's turn to choose the recipe, and she selected Cherry Rhubarb Cobbler, page 415. You can find the recipe here.

Planning:

I was glad this recipe was chosen. We had about 1.5 pounds of cherries in the fridge that we’d bought for another recipe that we hadn’t ended up making – enough for a recipe and a half of Dorie's cobbler.

Our local Whole Foods did not have any rhubarb so I decided to substitute some very ripe peaches on my countertop. This seemed like a good pairing, especially since the recipe called for ginger in the filling and in the topping. Ginger and peach go well together! I had a few concerns about this biscuit-style cobbler - I didn't want it to be dry and crumbly. I'm so used to a batter-based topping.

Cooking:
The fruit was easy, thanks to my little plastic cherry pitter - it made the job a whole lot more manageable. To the pound and a half of cherries I added nearly a pound of very ripe Georgia peaches.


For the dough, I used one part white flour, one part whole wheat flour, and one part King Arthur white whole wheat. I didn’t have any whole milk, so I mixed some heavy cream with skim milk.

I have never made dough in the food processor, so I was eager to try. It all went very quickly, and I processed maybe a second too long – the dough was just starting to ball up on the processor blade.

I gently turned it out onto the floured countertop and lightly formed a rectangle so I could cut 30 squares. This was definitely going oh so smoothly!

At that point I realized that I had forgotten to add the salt and the ginger to the biscuits. Darn! I ended up measuring and sprinkling salt and ginger on top of the rectangle and cautiously kneading it into the dough – trying to walk that line between incorporating the ingredients and over-handling the dough.

Then I cut the dough into squares, rounded each one into a little ball, and dotted them on top of the filling in the baking dish.

The balls of dough looked pretty good on top of the fruit, and cooked up golden and puffy – and the filling got bubbly – in just under 35 minutes.

The Verdict:
Everyone really liked this cobbler. To my relief it was not dry. The biscuits had great flavor and complemented the juicy fruit filling very well. We loved the ginger and the whole wheat. The filling was cooked perfectly and just the right amount of sweetness. My husband ate this for dessert three dinners in a row – in fact he said he prefers this to my regular cobbler (recipe in the previous post)! I will be making this recipe again.

[update: I just realized that my post is dated Monday, July 21. I'm not trying to break the rules! I wrote the entry on Monday, but put it on a delay to post on Tuesday, July 22. I'm not sure what happened, but this could be a problem since I'm making my galette today and was going to do a delay posting for next Tuesday, when I'll be out of town. hmmm, not sure how to proceed...]

Cobblers I have known (and loved)

Northerners seem to have a different view of cobbler from those of us residing in the south. And I say that as a Yankee transplant. The only cobbler I knew growing up in New England was my mom’s cherry cobbler which was canned cherries (or maybe that canned cherry pie filling) and bisquick-type biscuits on the top. Which tasted good, and will forever remind me of my childhood. Other cobblers from up north seem to all have that biscuit thing (sometimes very dry) on top.

When I moved south, however, I discovered the glorious wonders of fresh fruit cobbler. Southern cobbler as I know it integrates fruit with a batter (rather than a dough) – in fact it is usually made by melting the butter in the bottom of a casserole dish, then pouring in a liquid batter (flour, sugar, baking powder and milk), then sprinkling the fruit on top. As it cooks, the fruit sinks through the batter, which thickens and develops a wonderful crispy golden skin on the top and a tender, sweet inside.

Peach/blueberry and peach/blackberry cobbler are a summer staple at our house. There is nothing better than local Georgia peaches (or South Carolina peaches in a pinch!) in a piping hot cobbler. The recipe I use is derived from one in Jane Brody's Good Food Book (now out of print):

Blueberry Cobbler

ingredients:
2 T butter
2/3 cup flour (you can use 1/3 cup of whole wheat flour)
½ cup sugar (or less)
1 ½ tsp baking powder
¼ tsp salt
2/3 cup skim milk
2 cups blueberries (or other mixed fruit - my favorite is blackberry/peach - you can increase the fruit to 2 1/2 cups)

baking dish (can use a 9" square dish, but I've also used a deep casserole and increased the cooking time)

directions:

1. Preheat oven to 350 degrees.

2. Put butter in bottom of baking dish, and place in hot oven until melted.

3. Meanwhile, combine dry ingredients in a medium bowl.

4. Add milk to dry ingredients and whisk until smooth.

5. Pour in batter into hot buttered dish and sprinkle blueberries on top.

6. Bake in a preheated 350 degree oven for 40 minutes or until lightly browned.

Sunday, July 20, 2008

Hot and Spicy!

This is the second time I've made Grilled Chicken Breasts with North African Spice Paste, and it's our new favorite chicken! The recipe calls for several different kinds of seeds as well as peppercorns and dried chiles that have to be ground up in a spice mill/coffee grinder or a mortar/pestle. I don't have a spice mill, so the first time I ground everything with a mortar and pestle, over the course of about three days. This was for 4 chicken breasts! I vowed that I would not do the grinding by hand again, and promptly placed an order for a new electric coffee bean grinder which can be used for spices. Unfortunately a week later the vendor realized the grinder was out of stock and cancelled my order. In the meantime I'd decided to serve this at a family gathering, this time doubling the recipe. I took my backup pepper grinder and fed all the spices, the chiles and the peppercorns through it, grinding it by turning the little crank manually. This took several hours' worth of time, and although the results are delicious, I will not be making this recipe again without electrical grinding assistance. I've also been working out substitutions of already ground spices, although I'm sure it will not taste as fresh. Here is a picture of the spice rub. As far as I'm concerned, this is a bowl of liquid gold: The Verdict: This is absolutely delicious - do not count on any leftovers. It can be made spicier by increasing the red chile peppers or not as hot by reducing the amount. Here's the recipe with my notes and directions for broiling rather than grilling: Yield: makes 4 servings. ingredients: 8 (2-inch-long) dried hot red chiles - I used 6 of my own which are extremely hot 2 tablespoons coriander seeds 1 tablespoon cumin seeds 1 tablespoon caraway seeds 2 tablespoons minced garlic 1 tablespoon black peppercorns 2 teaspoons kosher salt 5 tablespoons olive oil 4 large chicken breast halves with skin and bone (about 3/4 pound each) - I used Bell and Evans chickens from Whole Foods special equipment: an electric coffee/spice grinder or a mortar and pestle; directions: 1. Coarsely grind chiles, spice seeds, garlic, and peppercorns in grinder or with mortar and pestle, then stir together with salt and oil in a bowl to form a spice paste. This can be kept, covered and chilled for up to 4 days. 2. Rub paste all over chicken. Can do this up to 4 hours in advance, refrigerating the chicken. 3. Oil broiler pan, then place chicken, skin sides up, on the pan and broil the chicken on “convect broil”, high heat, approx. 3” from the flame, turning once, for 7 minutes or so, until skin begins to brown, turning chicken over once with tongs. 4. Moved the pan down to the center of the oven, still set on convect broil – high heat - skin side up, until it is browned nicely. Then set the oven to “convect roast” on 375 degrees until done. Instead of broiling, you can also roast chicken in the oven at 375 degrees. 5. Transfer to a platter and let stand 5 minutes before serving.

Saturday, July 19, 2008

What is your quest???


As I previously posted, the "best" CCC is a hot question in the baking world right now. We are on a mission to see if any of the contenders can top our old stand-by cookies, which are the perfect combination of large, chewy, soft and crispy, PLUS, loaded with chocolate (I've updated the previous post to include our recipe). In the course of necessary cookie internet surfing I came across an interesting article about the little changes in a recipe that cause CCCs to come out soft, chewy, cake-like, crisp, crunchy, or spread-out.

Today my daughter j.d. baked a copycat recipe of the famous Levain Bakery CCCs (which won the Bobby Flay Throw Down), with a few of her own touches and the dough tasted amazing. She scooped out a generous amount of dough to make big cookies and they cooked up puffy and fat, but spread very little.

The Verdict:
The cookies were really good, but IMO they don't match the perfection of our regular recipe. I like a cookie that is flat and gooey in the center and slightly crisp at the outer edges. These were too puffy and cake-like for my taste.

Hot Summer Night II


A year or two ago, my friend AT introduced me to Steven Pratt's book Superfoods Rx: fourteen foods that will change your life. "I don't follow this slavishly," she said, "but I try to keep these foods in the house and I find that we naturally eat them more frequently." Reading the book re-energized me to think about nutrition, and I do try to keep the fourteen foods (and the additional 20 foods in the follow-up SuperFoods HealthStyle ) in mind.

Wild salmon is one of the super foods, and according to Pratt, should be eaten 2-4 times per week. I don't eat salmon even once a week, but I do try to pick up wild salmon when I'm passing the fish counter. I was looking for a new way to cook the most recent salmon purchase, and my trusty copy of The Hay Day Cookbook (now out of print) had a lovely-sounding recipe for a hot hot day.

I had about a pound of salmon, so made a partial recipe of the court bouillon to poach it. I halved the sauce recipe, knowing that I'd have extra. Canned green chiles come in very handy; I usually keep a bunch frozen in a Ziploc and take out just as much as I need.

The verdict:
This was very very good, and I'll no doubt make it again. I thought it was just the touch for summer - a good make-ahead dish that won't heat up the kitchen (since you make the court bouillon and poach the salmon ahead of time, ideally in the cool part of the day). The sauce was elegant and surprisingly creamy - although low in fat. I used regular whole milk yogurt, because we had a bit left in the fridge, but I'd like to try non-fat Greek yogurt. the leftover sauce was good the next day with citrus-y broiled chicken breasts.


Cold Poached Salmon with Avocado Sauce

Source: The Hay Day Cookbook by Maggie Stearns

ingredients:
1 four-pound fresh salmon (gills removed), poached* in Court Bouillon,** skinned and chilled
1 head leaf lettuce, washed and dried
1 lime, cut in wedges
1 T onion, finely chopped
1 T green chilies, seeded and finely chopped (can use canned, which I did)
1 very ripe avocado
1/3 cup plain yoghurt
2 T lime juice
salt and ground black pepper to taste
3 T olive oil
1 T fresh coriander (cilantro)

directions:
1. Arrange poached salmon an a serving platter that has been lined with curly lettuce. Garnish with lime wedges.
2. In a food processor, process the onion and green chilies until smooth. Add avocado and yoghurt with the lime juice and process 1 minute. Turn into a bowl and beat in salt, pepper, and olive oil a little at a time. Stir in coriander and refrigerate for ½ hour. Serve in a sauce boat topped with a little more chopped coriander.

*Poaching fish:Place in roasting pan, add hot Court Bouillon just to cover, seal with aluminum foil and bake at 375° until tender, approximately 10 minutes for each minute of thickness. Remove from broth while hot.


**Court Bouillon: the classic mixture for poaching fish is 2 cups of white wine, 2 cups of water, 1 stalk of celery chopped with its leaves, 1 chopped onion, 1 chopped carrot, 1 bay leaf, 10 peppercorns, and a little salt, simmered together for ten minutes before proceeding with the recipe.

Friday, July 18, 2008

On a Hot Summer Night...


...what could be more grand than cold gazpacho?

We have lots of very ripe tomatoes and nothing is more refreshing in the summer than a great gazpacho, imo. The best recipe I've ever cooked is from Jane Brody's Good Food Book. The cookbook is now out of print, but thanks to the wonders of the internet, you can see the actual cookbook page.

Although the recipe calls for green bell pepper, I used a red one - I love how it intensifies the red color of the soup. I used the food processor because it is on the counter and the blender is not - it turned out great.

Gazpacho Grande
Jane Brody

ingredients:
1 large cucumber, peeled, halved lengthwise, and cored to remove seeds, divided.
2 large tomatoes, peeled, cored, and seeded, divided
1 green pepper, halved and seeded, divided
1 medium onion, peeled and halved, divided
1 pimento
3 cups tomato juice, divided
1/3 c. red wine vinegar
1 tbsp. olive oil
1⁄4 tsp. hot pepper sauce (Tabasco)
1⁄4 tsp. salt if desired
1⁄4 tsp. freshly ground black pepper or more, to taste
3 to 4 garlic cloves, finely minced or crushed
Croutons for garnish (optional)

directions:
In a blender, combine half the cucumber, 1 tomato, half the green pepper, half the onion, the whole pimiento, and 1 cup of the tomato juice. Puree the ingredients at high speed.

Chop the remaining cucumber, tomato, green pepper and onion. Place the vegetables in a bowl, cover it and refrigerate it until serving time.

Pour the puree into a large serving bowl and add the remaining 2 cups tomato juice, the vinegar, oil, pepper sauce, salt, pepper and garlic. Refrigerate gazpacho, covered for at least 2 hours.

note:
nutritional info can be found here

Thursday, July 17, 2008

CCC Face-Off

It seems like everyone in the online baking world is talking about the recent New York Times article about chocolate chip cookies. There's a lively discussion at the King Arthur Flour blog, joined by the article author himself (the KAF people prefer their recipe). Also baking doyenne Dorie Greenspan blogged about the article (she's the one who suggested the salt to the author).

Our family's old standby CCC recipe is the modestly-titled "Chocolate Chip Cookies at Their Best" from the Sunset Magazine Favorite Recipes II cookbook (out of print but widely available used). We've always gotten rave reviews when we've made these cookies. "Our" recipe has oats and also some cinnamon, which give a real subtle boost to the texture and the flavor of the cookies, respectively. Sunset also calls for a 2-to-1 shortening ratio. Cooking with shortening really bothers me. While I've been using trans-fat-free shortening, it still has an "ick" to it. So I look forward to testing the all-butter NYT recipe. And then maybe Dorie's. Or Alton Brown's. Or Baking Illustrated. But then again, why mess with the Best?

[updated]
Here's our recipe:
Chocolate Chip Cookies at Their Best
Sunset Cookbook of Favorite Recipes II

1 cup solid shortening
½ cup butter or margarine, softened
1 1/3 cups granulated sugar
1 cup firmly packed brown sugar
4 eggs (or equivalent egg substitute)
1 tablespoon vanilla
1 teaspoon lemon juice
2 teaspoons baking soda
1 ½ teaspoons salt
1 teaspoon ground cinnamon
½ cup regular or quick cooking rolled oats
3 cups all-purpose flour
2 large packages (12 oz. each) semisweet chocolate chips

1. In large bowl of an electric mixer, beat shortening, butter, granulated sugar, and brown sugar at high speed until light and fluffy (about 5 minutes).

2. Add eggs, one at a time, beating well after each addition.

3. Beat in vanilla and lemon juice.

4. In another bowl, stir together baking soda, salt, cinnamon, oats and flour.

5. Beat into creamed mixture until well combined.

6. Stir in chocolate chips.

7. For each cooky, drop a scant ¼ cup dough on a lightly greased baking sheet, spacing cookies about 3 inches apart.

8. Bake in a 340° oven for 16 to 18 minutes (or less) or until golden brown.

Bread 2.5 x .40 = Bread 1.0

Just in case you don't have, say, 8 or 9 very ripe bananas lying around, or you just want to make 1 loaf of Bread 2.5, you could always make 40% of the recipe!

This should work:

Bread 1.0

1 cup whole wheat flour
1 1/6 cup white flour or a mix of white flour and white whole wheat (King Arthur)
1/3 tsp baking soda
1 tsp baking powder
scant 1/2 tsp salt
1 cup mashed ripe banana
1/2 cup brown sugar
scant 1/4 cup oil
1 cup plain nonfat yogurt or buttermilk
1 egg plus 1 egg white (or no eggs)
1 cup ground nuts/oats (no more than half oats)
1 cup fresh or frozen wild blueberries

Wednesday, July 16, 2008

Wholesome Goodness


Today it was time to bake bread - well the easy, quick variety. Over time I've devised a good and healthy whole wheat banana blueberry bread that I try to keep on hand. Whenever I have ripe bananas, I mash them and then measure and freeze the puree for baking time.

I call this Bread 2.5, because that is how much of just about everything goes into this bread. And it makes 2.5 loaves. AND it’s 2.5 times better for you than other muffins and scones - this bread is very low in fat and sugar and is packed with nutrients.

It changes nearly every time I make it. Once I left out the eggs completely (by accident) and it was delicious – dense and moist. So if you have anyone in your family with egg allergies (Hi, Bob!) you can omit the eggs. OTOH, if you wish to boost the protein content, you can use all 4. Today I used 2 eggs' worth of Egg Beaters.

Bread 2.5

Ingredients:

2 ½ cups whole wheat flour
2 ½ cups white flour
1/3 cup white whole wheat flour (King Arthur)
¾ tsp baking soda
2 ½ tsp baking powder
1 tsp salt
2 ½ cups mashed banana
1 ¼ cup brown sugar (I use half dark brown and half light brown)
½ cup oil
2 ½ cups plain nonfat yogurt or buttermilk
0 – 4 eggs (or equivalent in egg substitute)
2 ½ cups of ground nuts (toasted is nice) and whole oats mixed (I used 1 cup walnuts, 1 cup pecan meal, 1/2 cup oats), no more than half oats
2 ½ cups fresh or frozen wild blueberries

{update: I've added a few ingredients that make this bread even more wonderful: about 1 tsp lemon juice to the wet ingredients, and some cinnamon and nutmeg to the dry - just around a teaspoon or less of each}

Directions:

1. Mix dry ingredients in bowl (flours, soda, powder and salt)

2. Mix banana, sugar, oil, yogurt and eggs in a very large bowl


3. Add the dry ingredients to the banana mixture in three stages, stirring to incorporate.

4. Stir in nut mixture

5. Stir in blueberries

6. Pour batter into 2 full size and one half size loaf pans.


7. Bake at 325 for 55 minutes or until done.


Slice and enjoy! It's really delicious toasted.

Tuesday, July 15, 2008

Emphasis on the vinegar

I love Delia Smith's recipes, so much so that I'm considering subscribing to her site's premium content. I've cooked both sweet and savory dishes with great results.

I was excited to see her recipe for Chicken with Sherry Vinegar and Tarragon Sauce. It looked fantastic as pictured on her site, and I printed out the recipe. I couldn't wait to make it and purchased the ingredients. Saturday was the day!

First I browned the chicken, shallots and garlic as instructed, then sprinkled the tarragon and poured in the sherry and the sherry vinegar. Setting it to a bare simmer, I admired the beauty before me:


I expected that as the chicken cooked, the liquid would reduce to a nice syrup-y sauce with the lovely flavor of sherry and tarragon. Yum.

After the requisite 45 minutes, the chicken was cooked, but tons of thin liquid still remained in the pan. I removed the chicken and veggies and tried to reduce the sauce, but didn't have much luck.


After cooking the dish, I thought to check the forum posts on Delia's site and found that others had the same experience too much liquid, and that they found the taste too "sharp." Well, I do wish I'd seen this info in advance.


The Verdict:

I served up the chicken with some English peas (looking a little wizened). My husband loved it - gave it a full 10 on the scale of 1-to-10! In my opinion, there was too much vinegar flavor. Next time, I'd cut the sherry to 8 fl oz, and the vinegar to 1.5 fl oz.

[update]
Actually, upon further thought, I doubt that I'll make this again - there are just too many wonderful chicken recipes out there.

Cooking up a blog

We've been cooking around here a lot lately, and reading loads of cookbooks, cooking blogs, and recipe sites. With any luck, we can keep up with some of our culinary adventures here!